
Building a Serverless Application with AWS Lambda and Qdrant for Semantic Search

# LLMs
# AWS Lambda
# Qdrant
# Martin Data Solutions
Deploying and LLM Application with AWS Lambda and Qdrant
July 2, 2024
Benito Martin
Author: Benito Martin
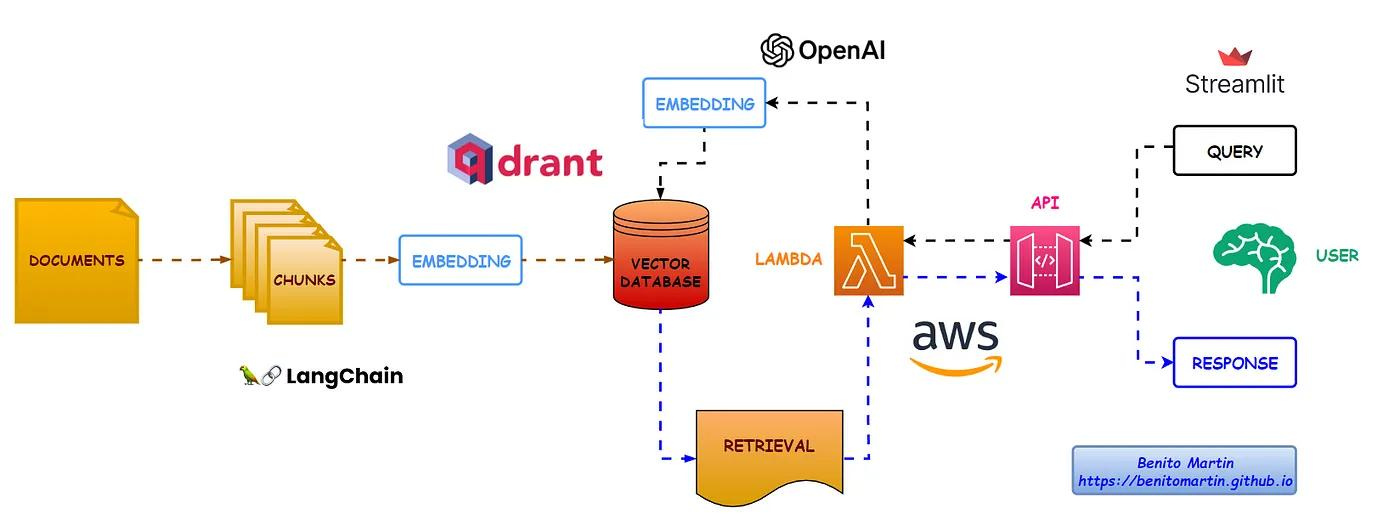
In this post, I’ll explain how to build a serverless application to perform semantic search over academic papers using AWS Lambda and Qdrant. I used LangChain and OpenAI’s embeddings to create vector representations of document chunks and store them in Qdrant. A simple shell script helps build and push the Docker image to AWS ECR and deploy it as an AWS Lambda function. After testing the Lambda function, I created an API Gateway endpoint and built a Streamlit application to interact with our Lambda function.
Let’s dive in!!!
Prerequisites
Before we start, ensure you have the following:
- An AWS account with necessary permissions to create Lambda functions and ECR repositories: AWSLambda_FullAccess, AmazonEC2ContainerRegistryFullAccess
- One Qdrant cluster and the corresponding API Key and URL
- OpenAI API keys
- Docker installed for building and pushing the Lambda Function and Docker image
Step 1: Setting Up Environment Variables
Create a .env file in your project directory with the following content:
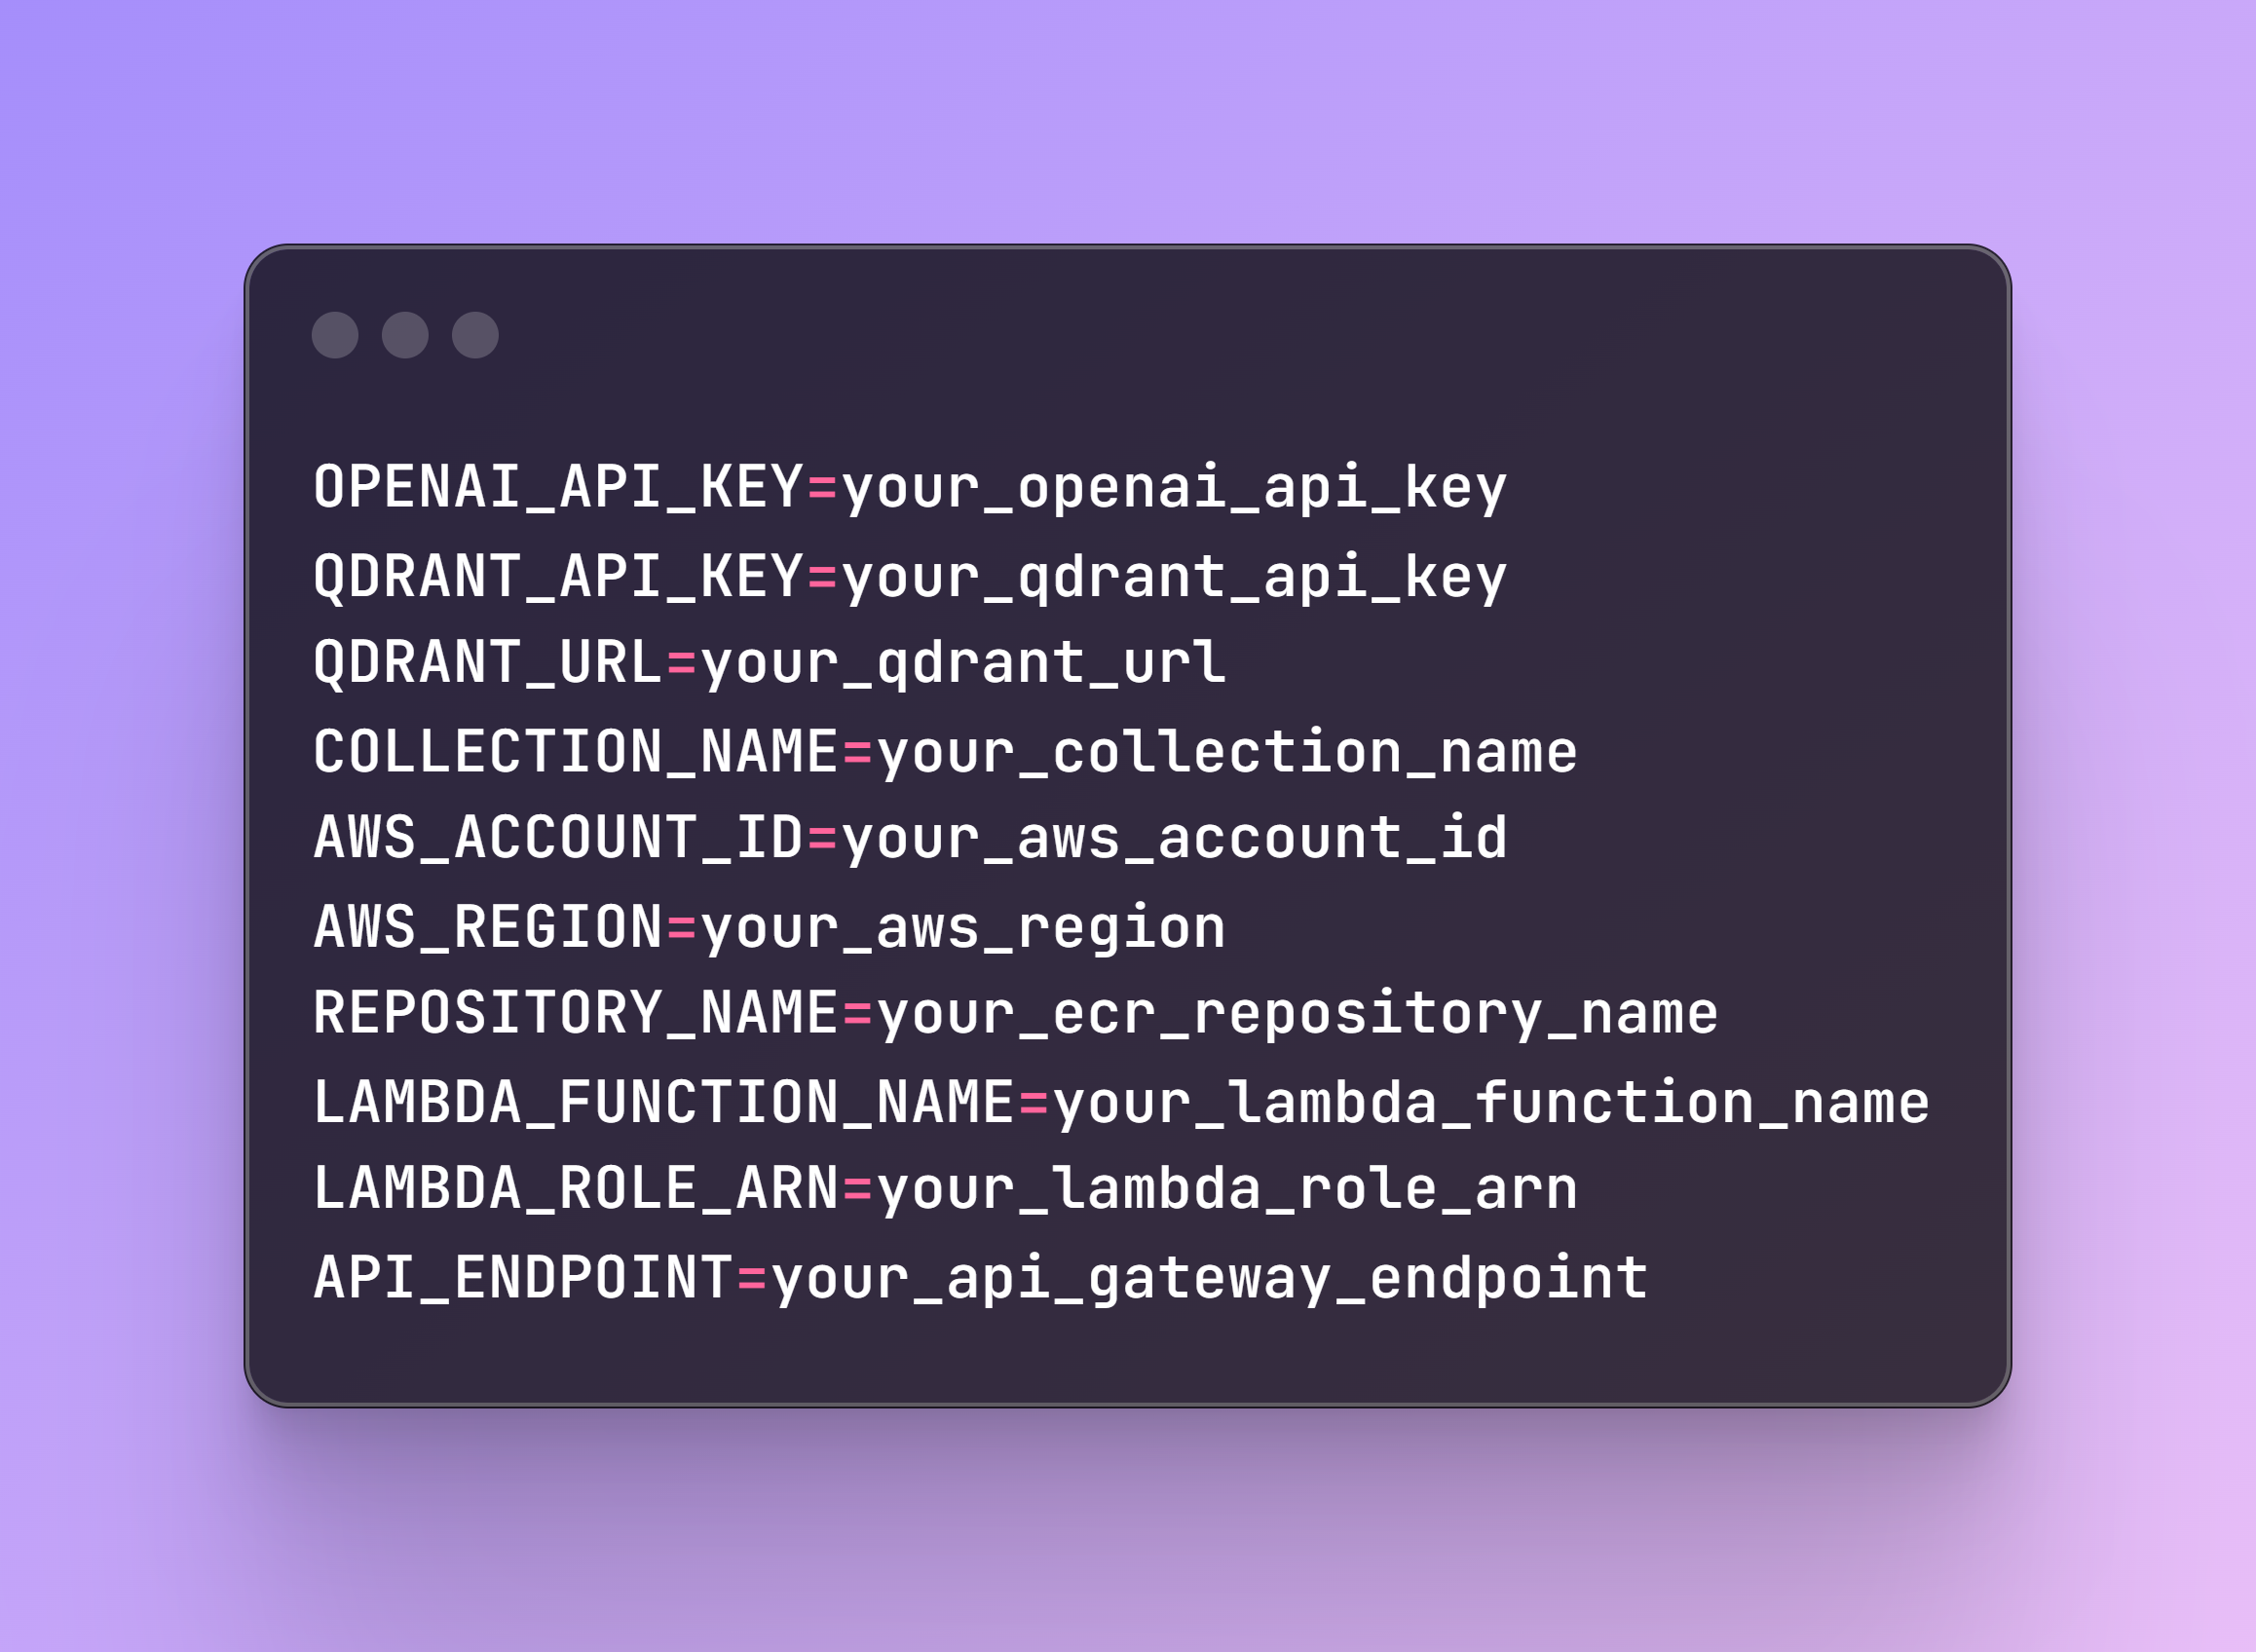
The LAMBDA_ROLE_ARN is previously created in the AWS account. The API_ENDPOINT will be provided once you create the endpoint, which will be explained in Step 7.
Step 2: Creating the Vector Store
File name: create_vector_store.py
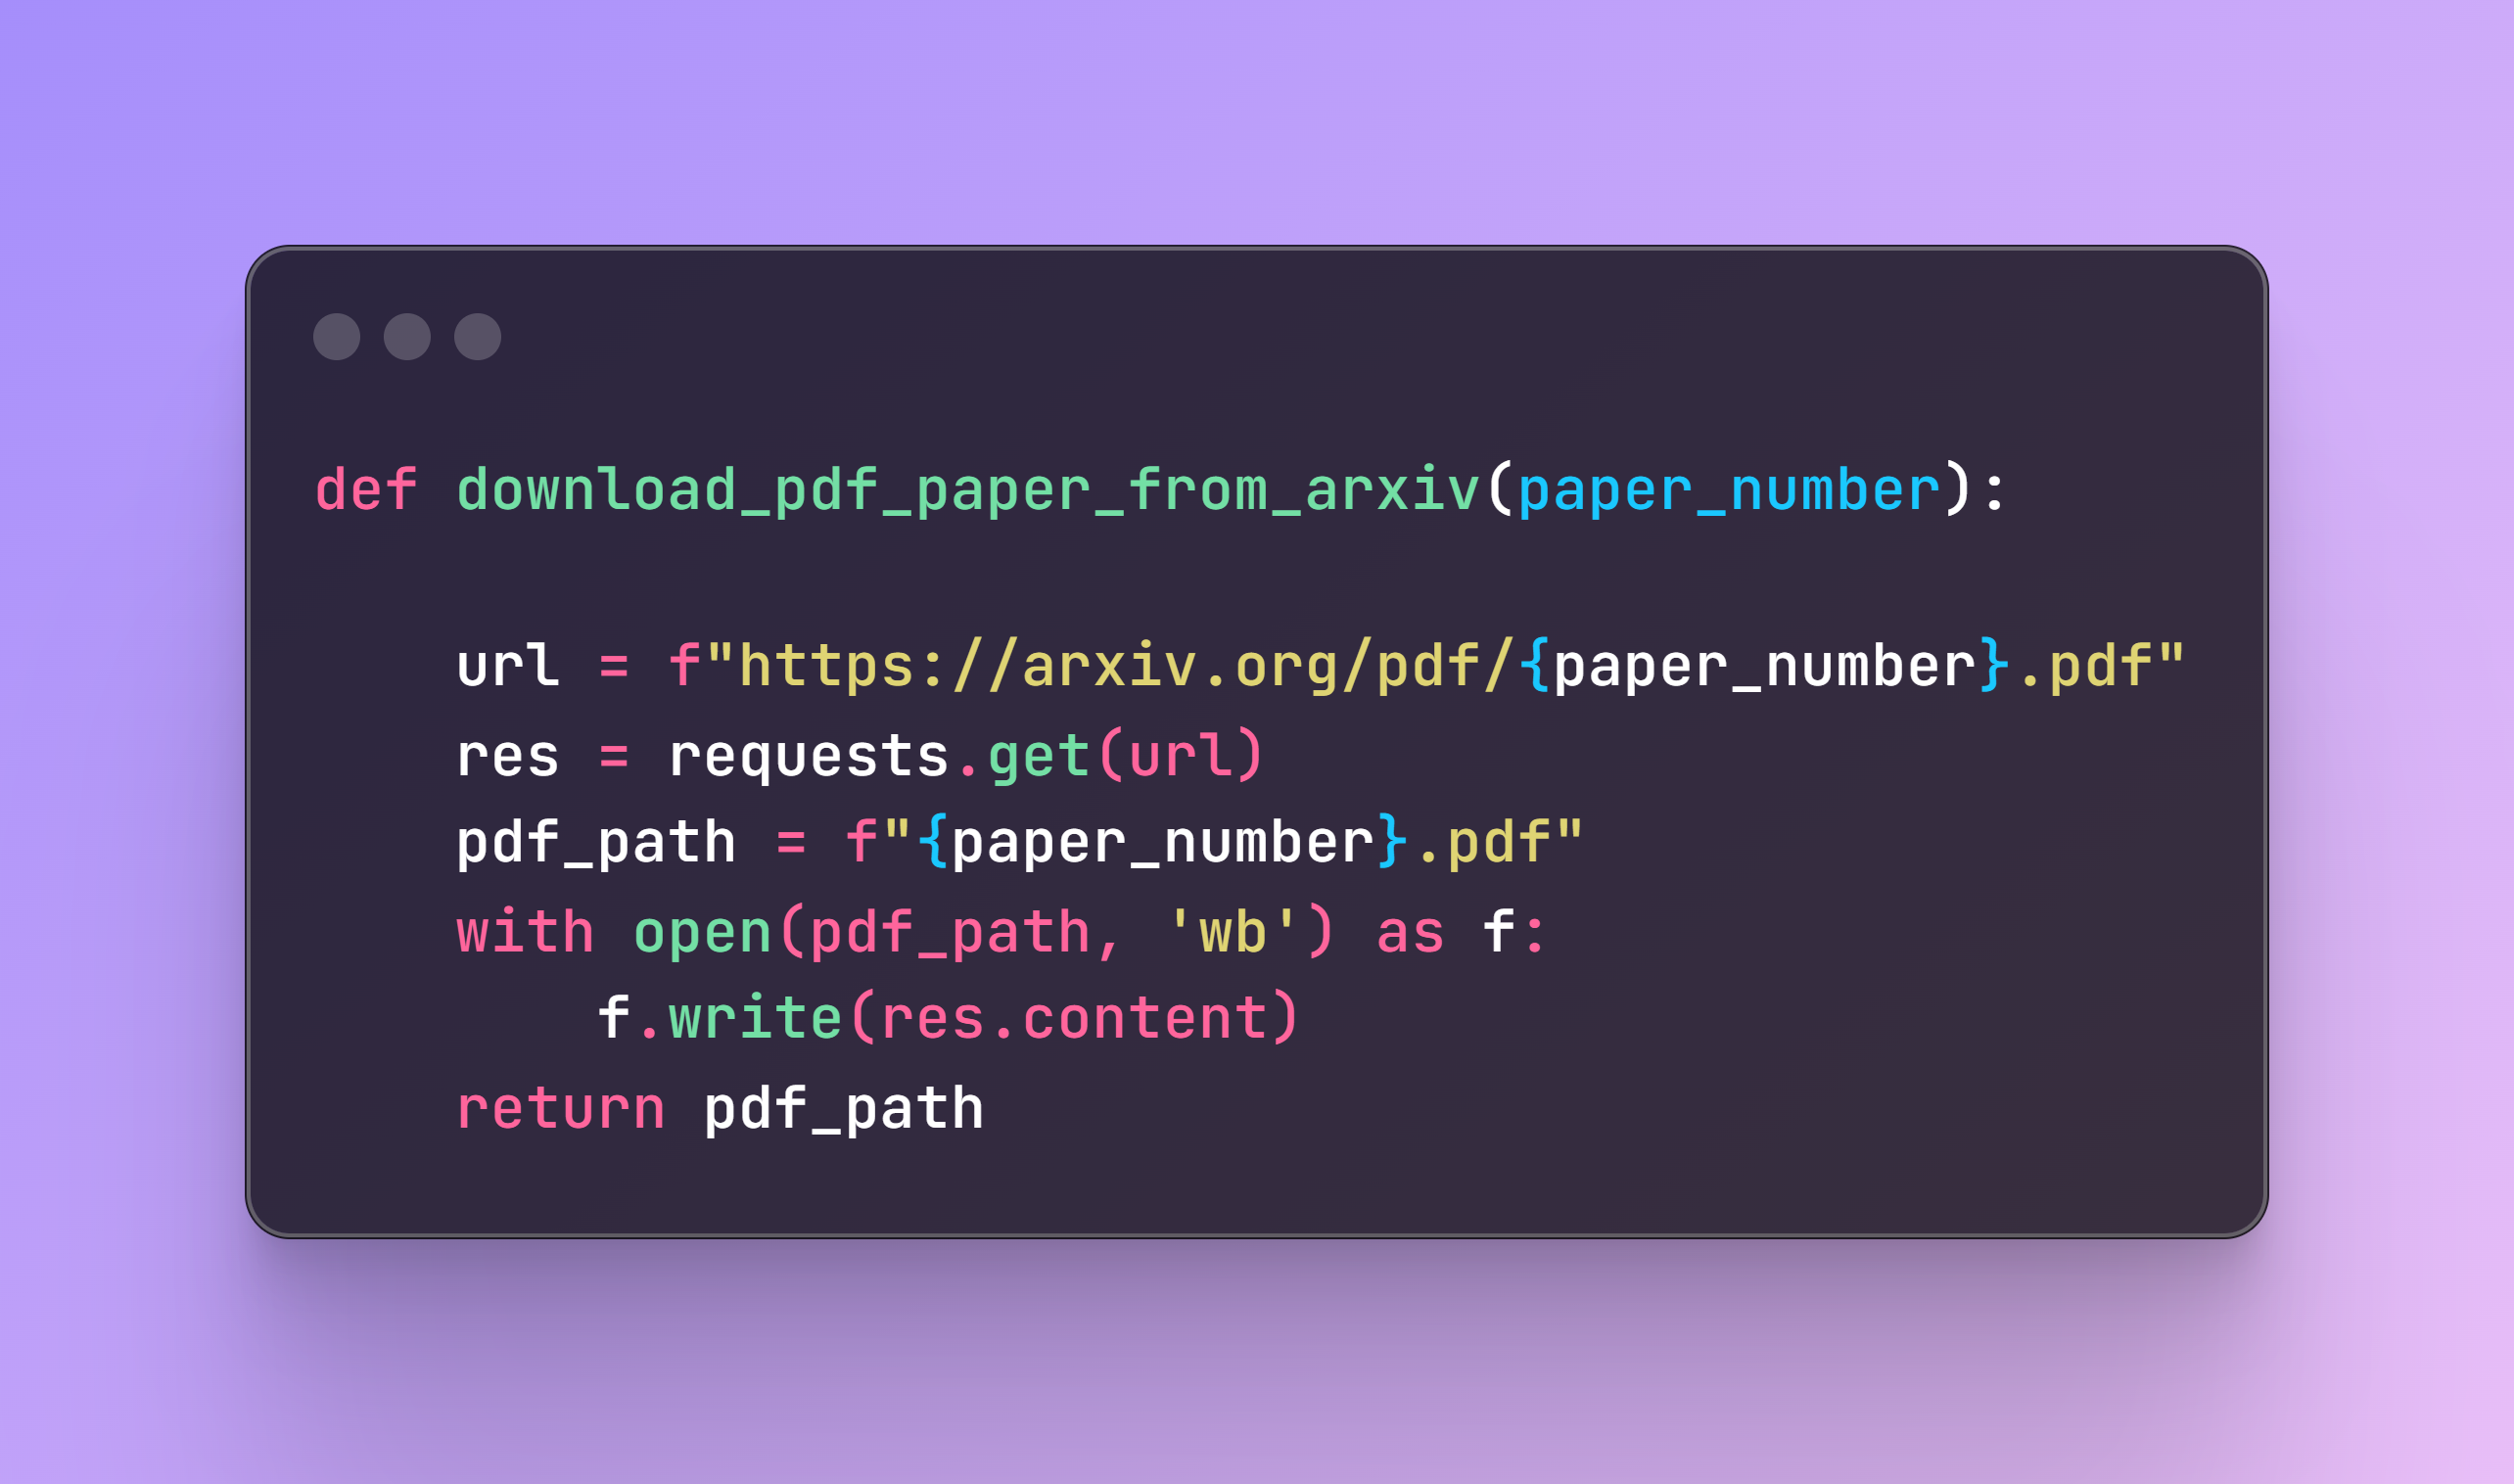
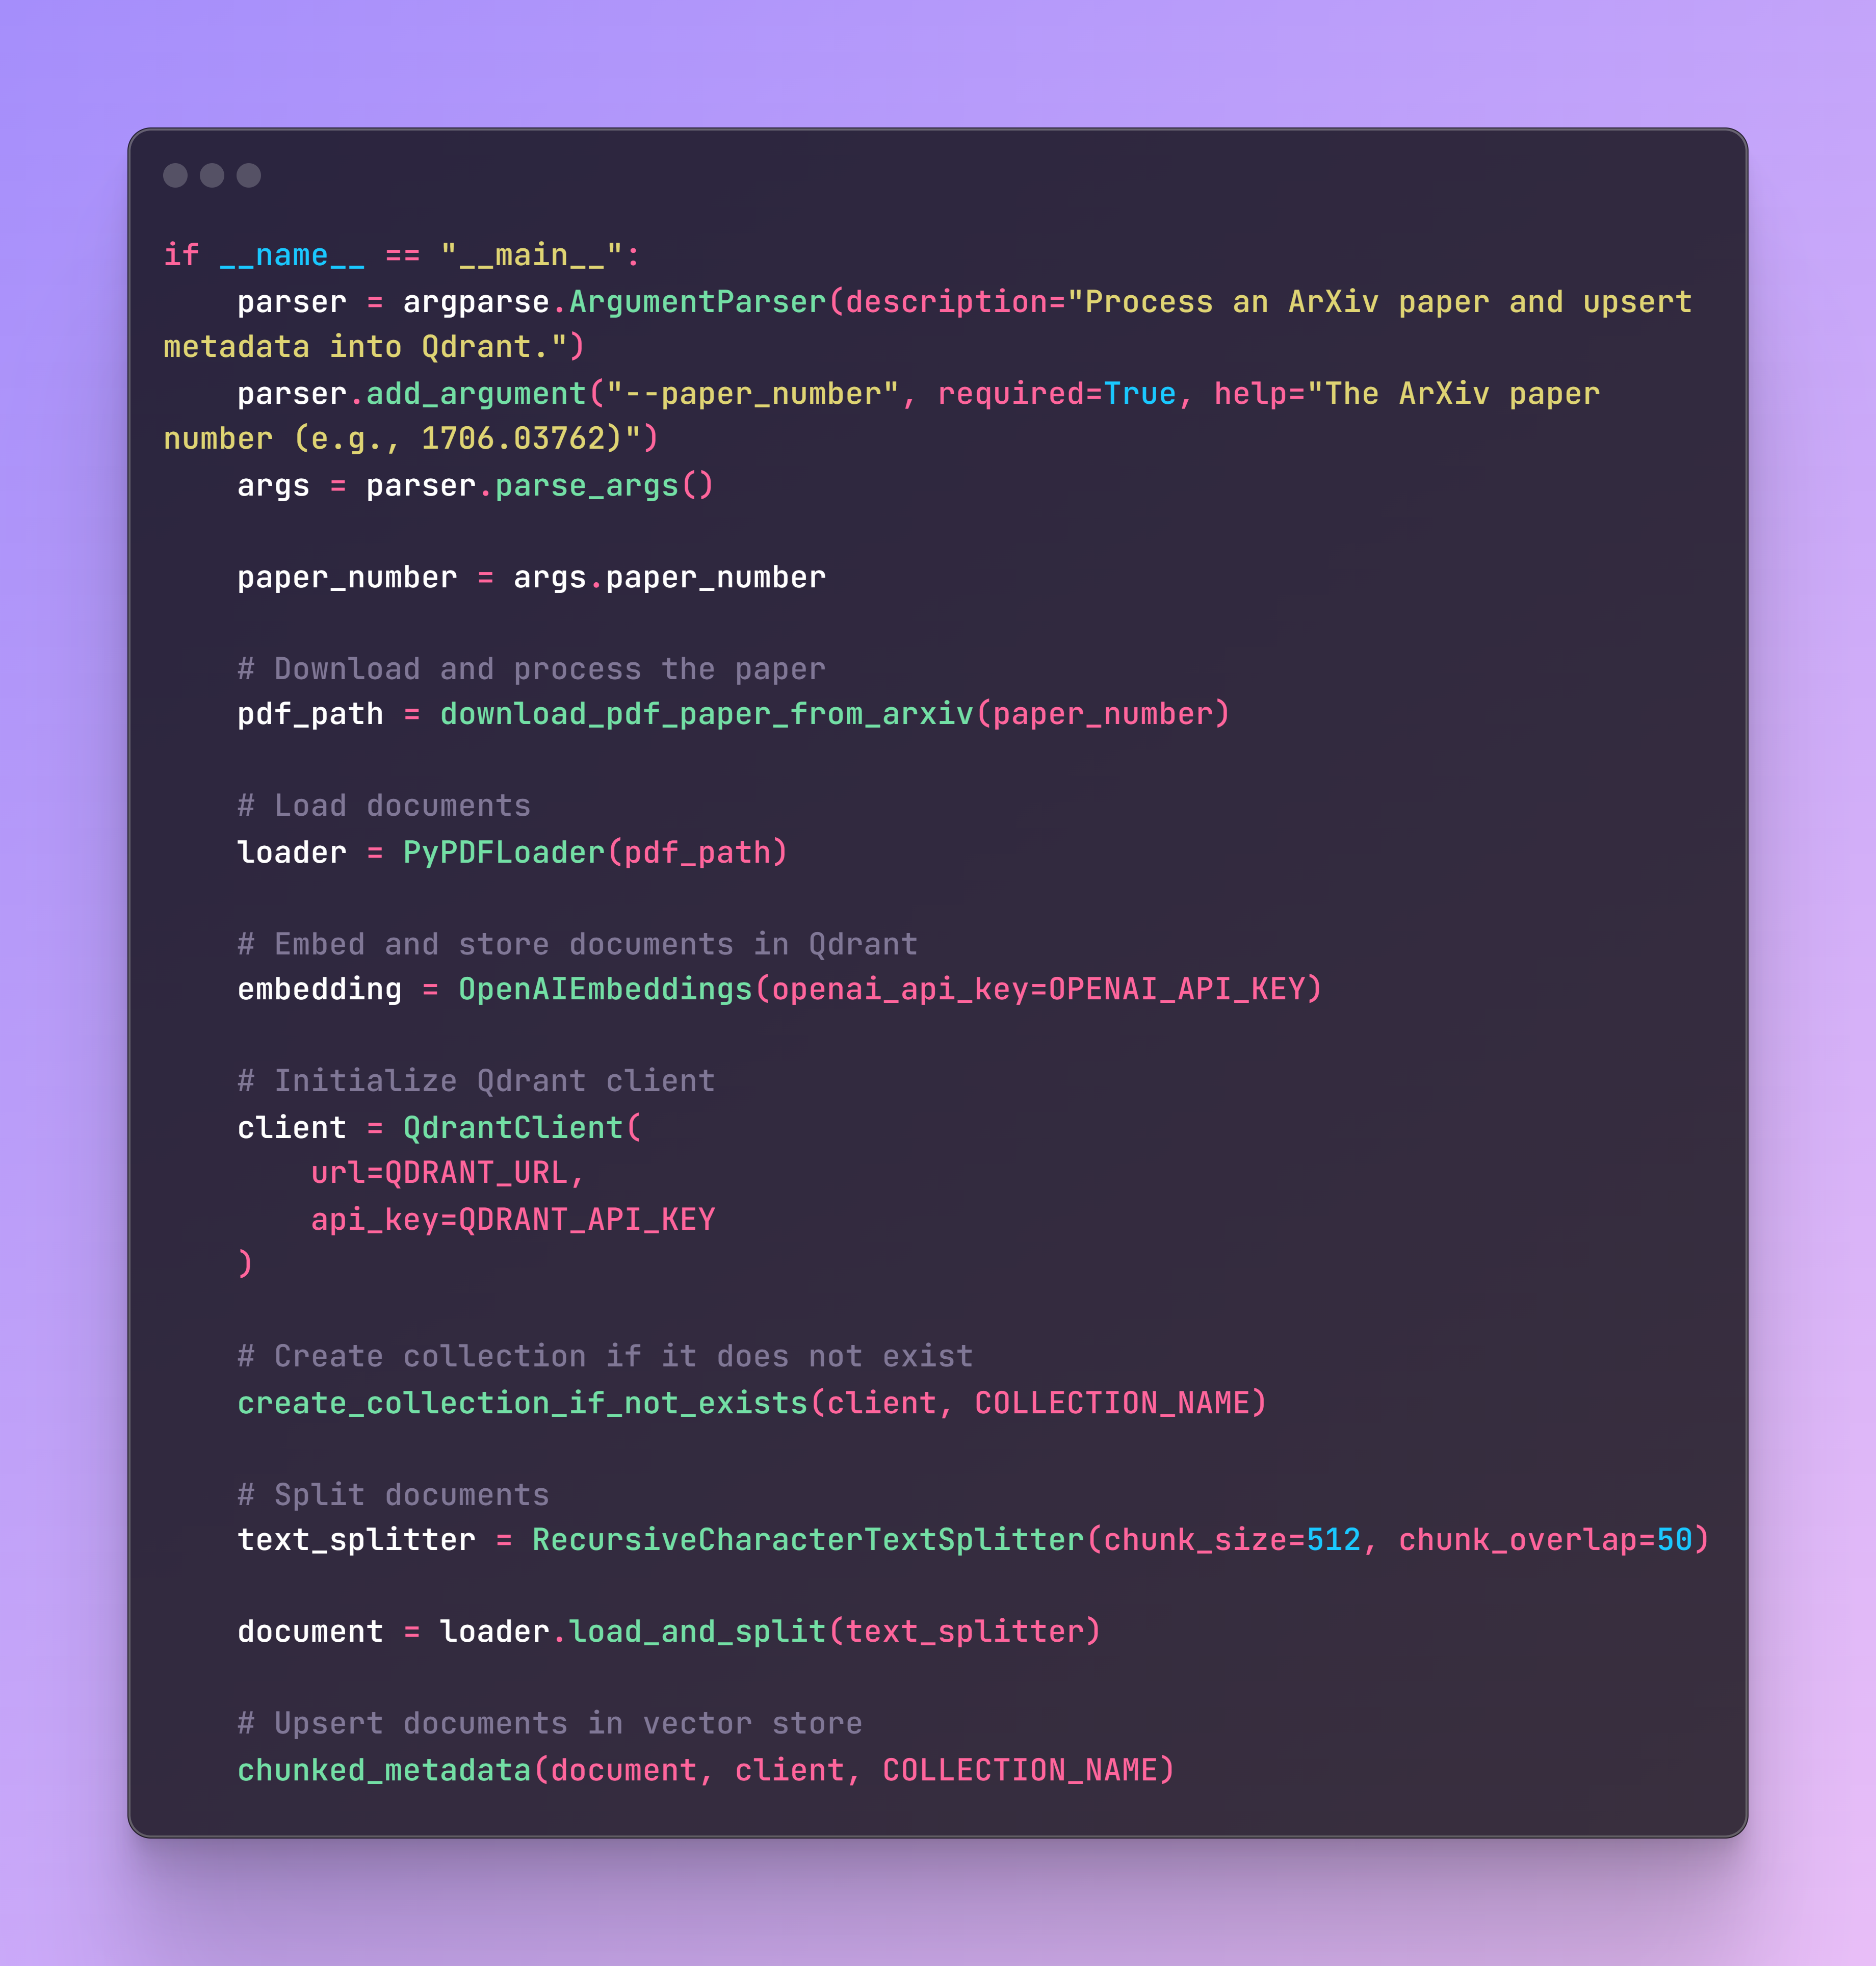
To create the vector store, we first need to load our academic paper. Fortunately, all papers follow the same structure, so by selecting the corresponding paper number, the following code will fetch it and save it locally on your computer.
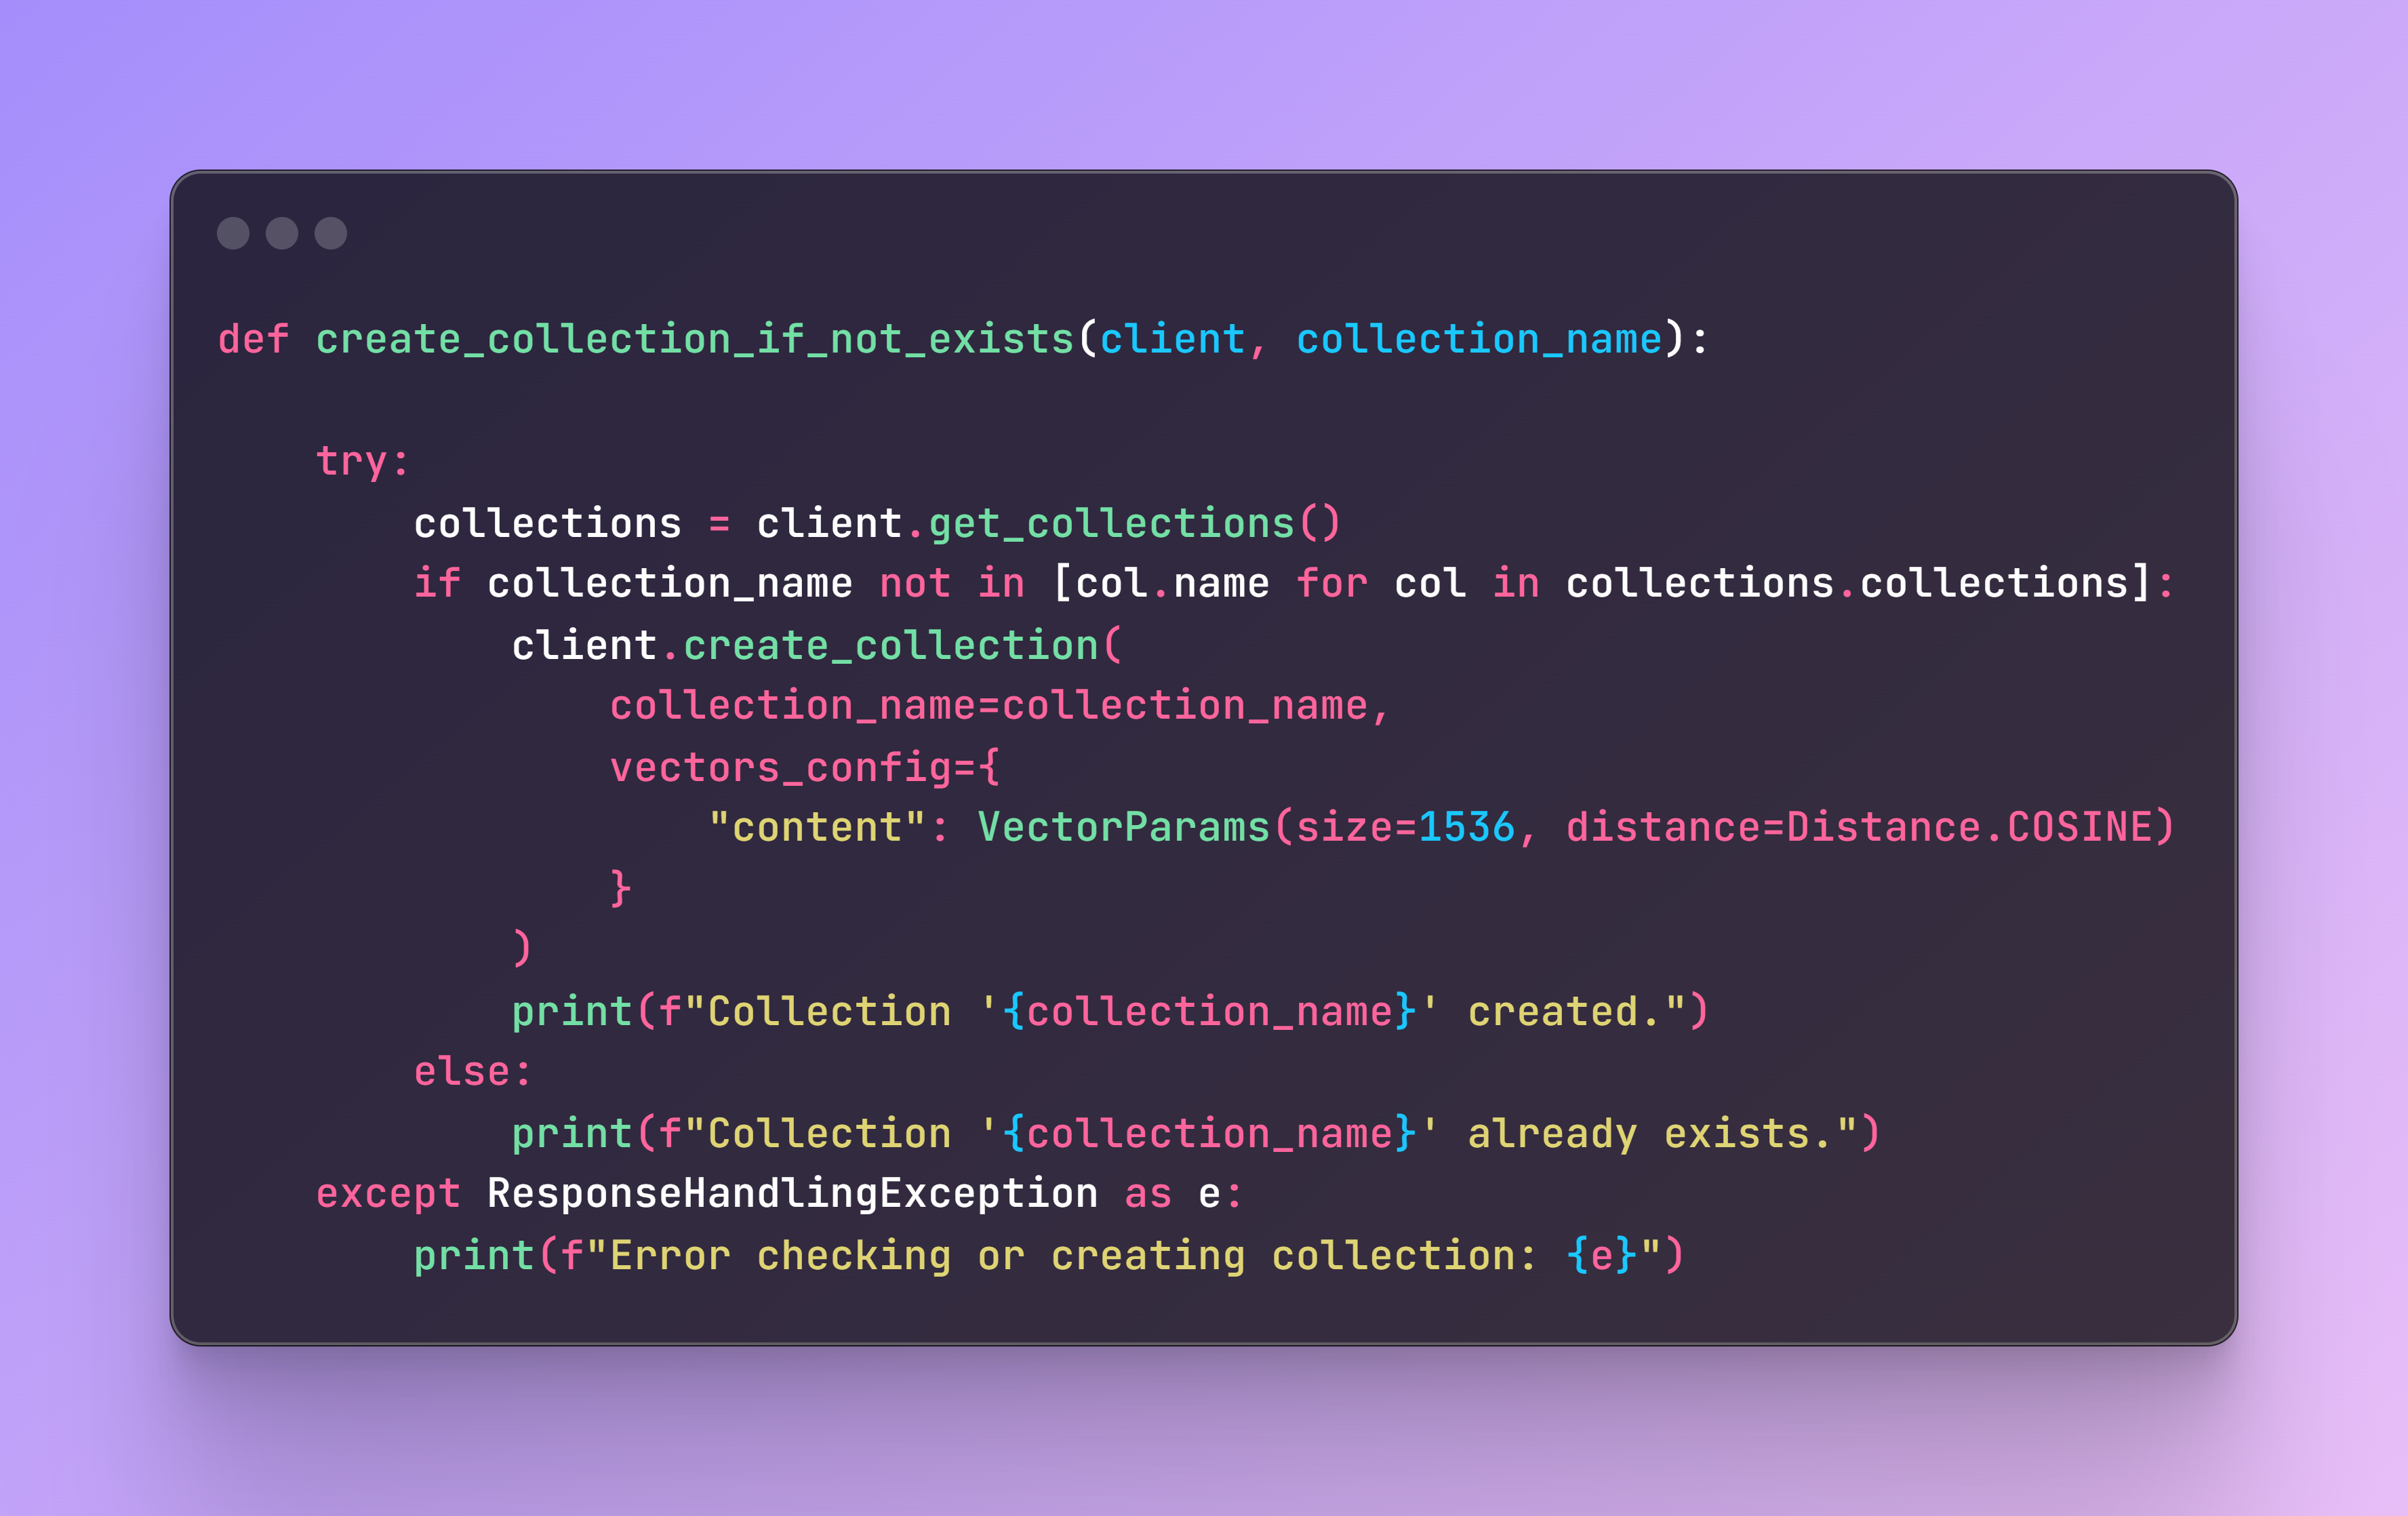
Next, we need to check if the collection exists in our cluster. If it doesn’t, it will be created.
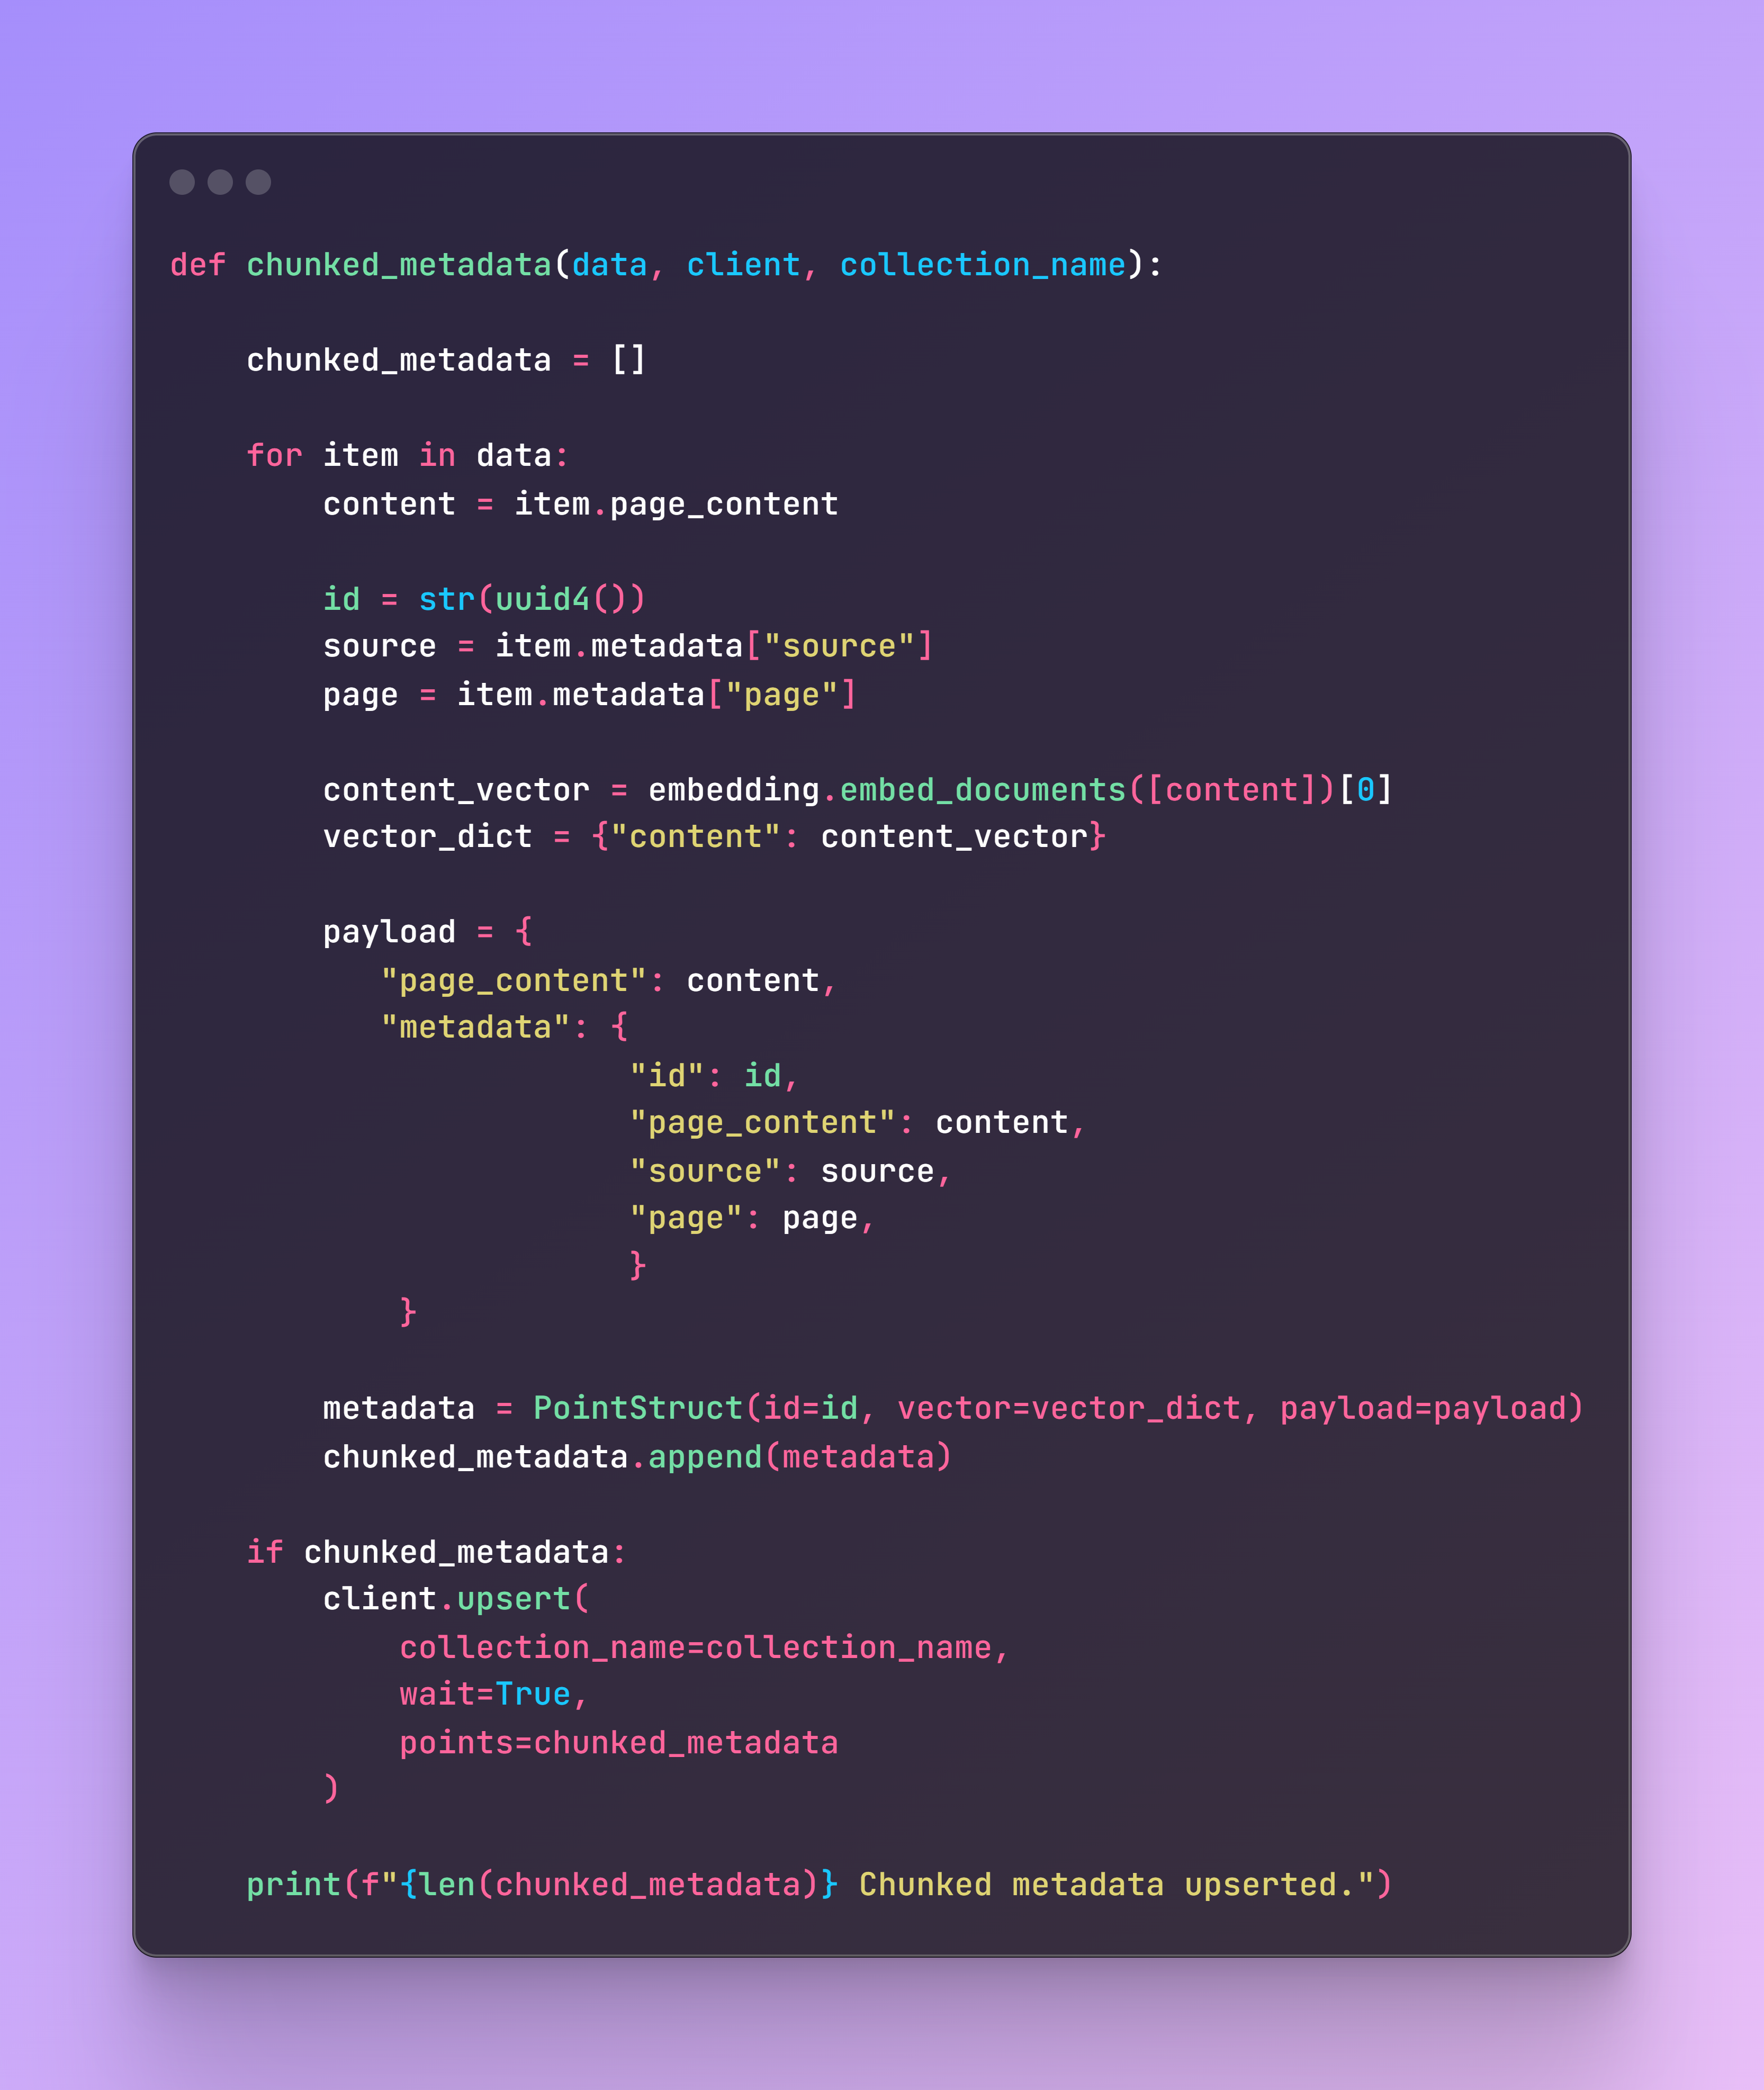
All academic papers contain the same structure, so each document that is loaded will contain the page content, source, and page. As metadata, I selected these three and added an additional unique identifier to easily find the specific chunk.
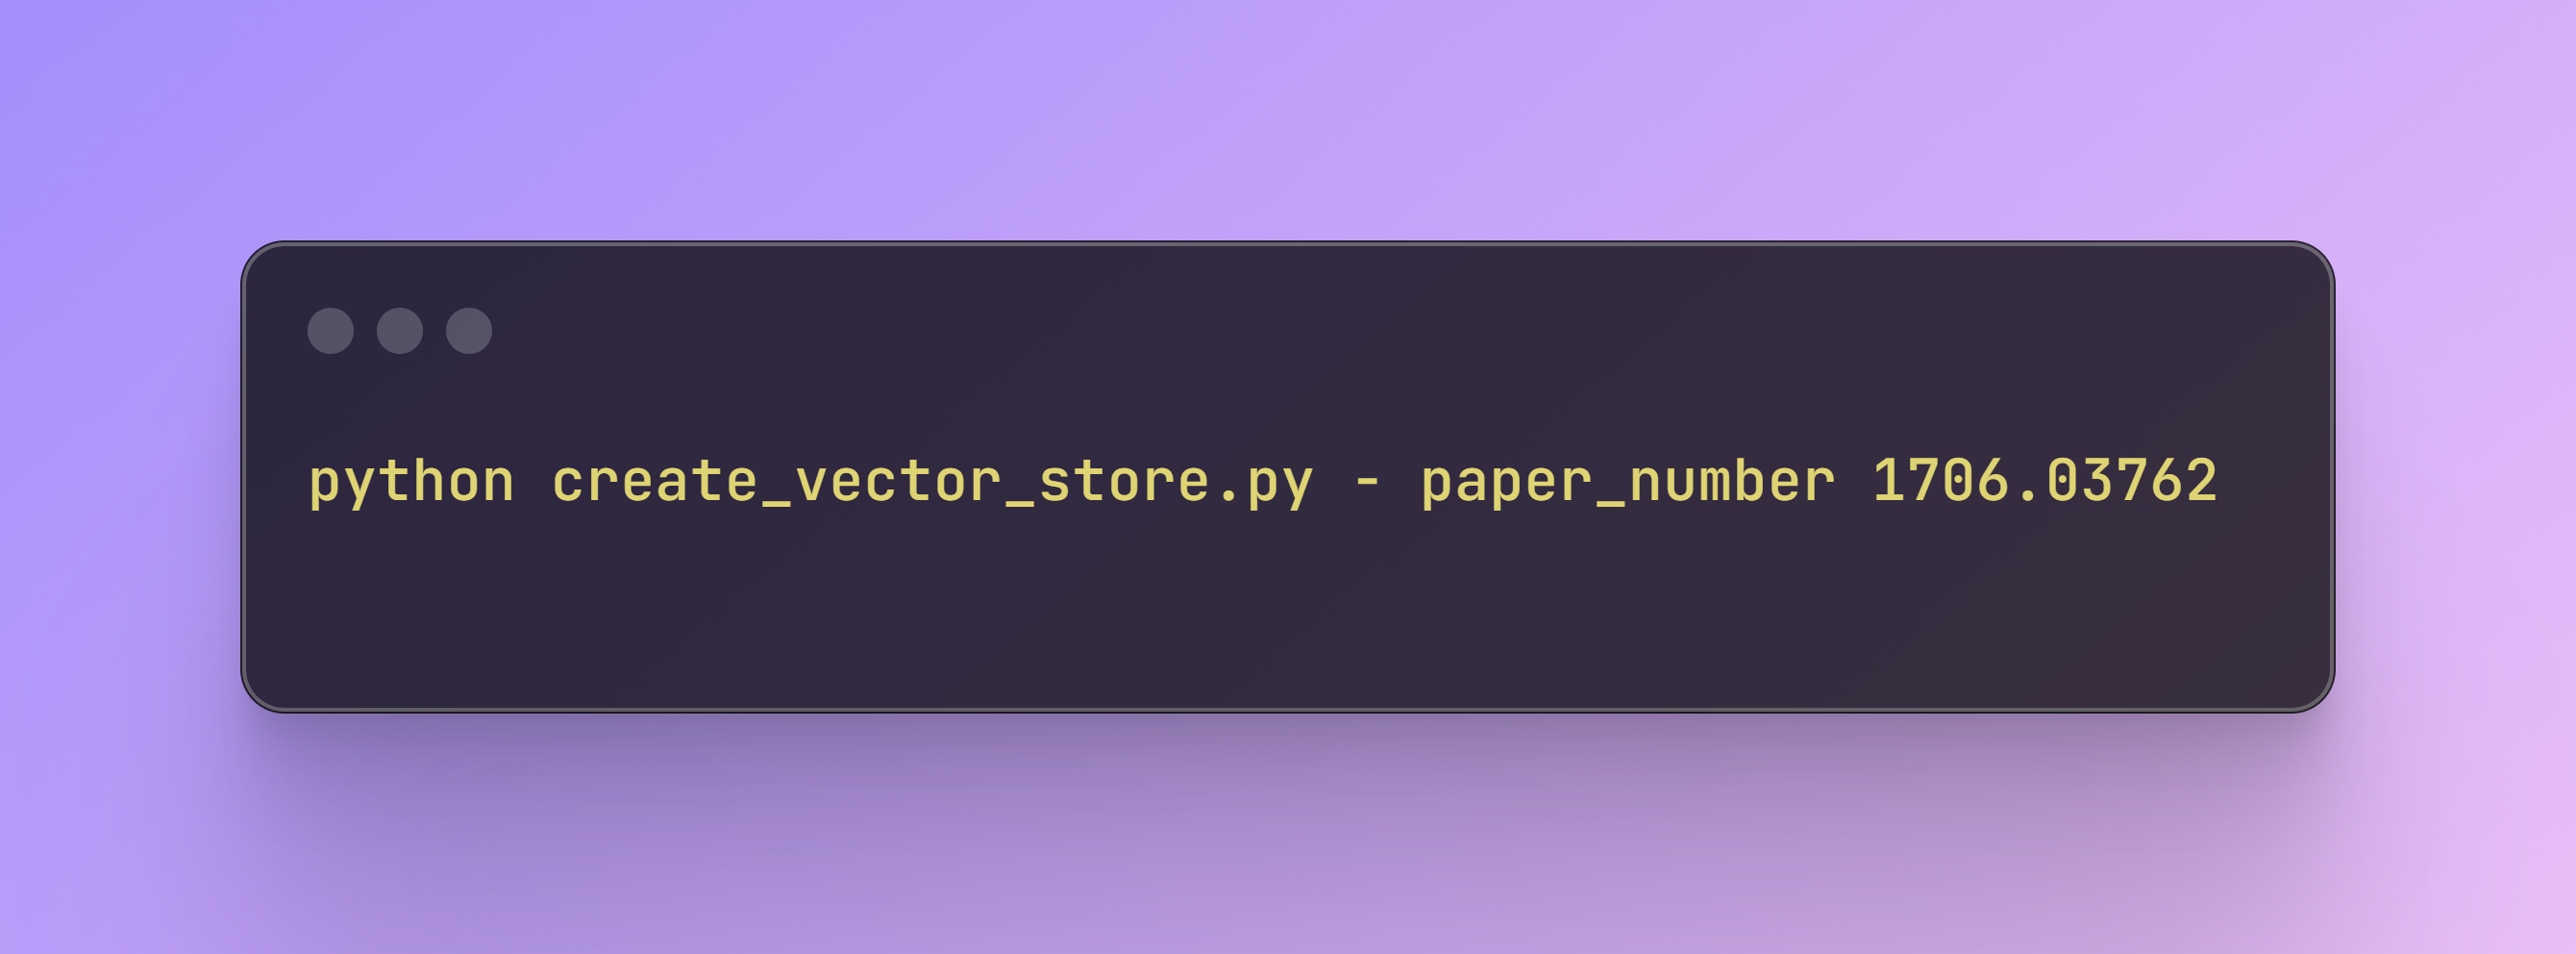
Now it’s time to trigger the function by selecting the corresponding paper number, and the chunks will be ready to be retrieved in the cluster collection.
Step 3: Creating the RAG Application
File name: rag_app.py
Now we need to create a function for retrieval and generation of responses using the Qdrant vector store as a retriever and an LLM model, in our case GPT-3.5-turbo.
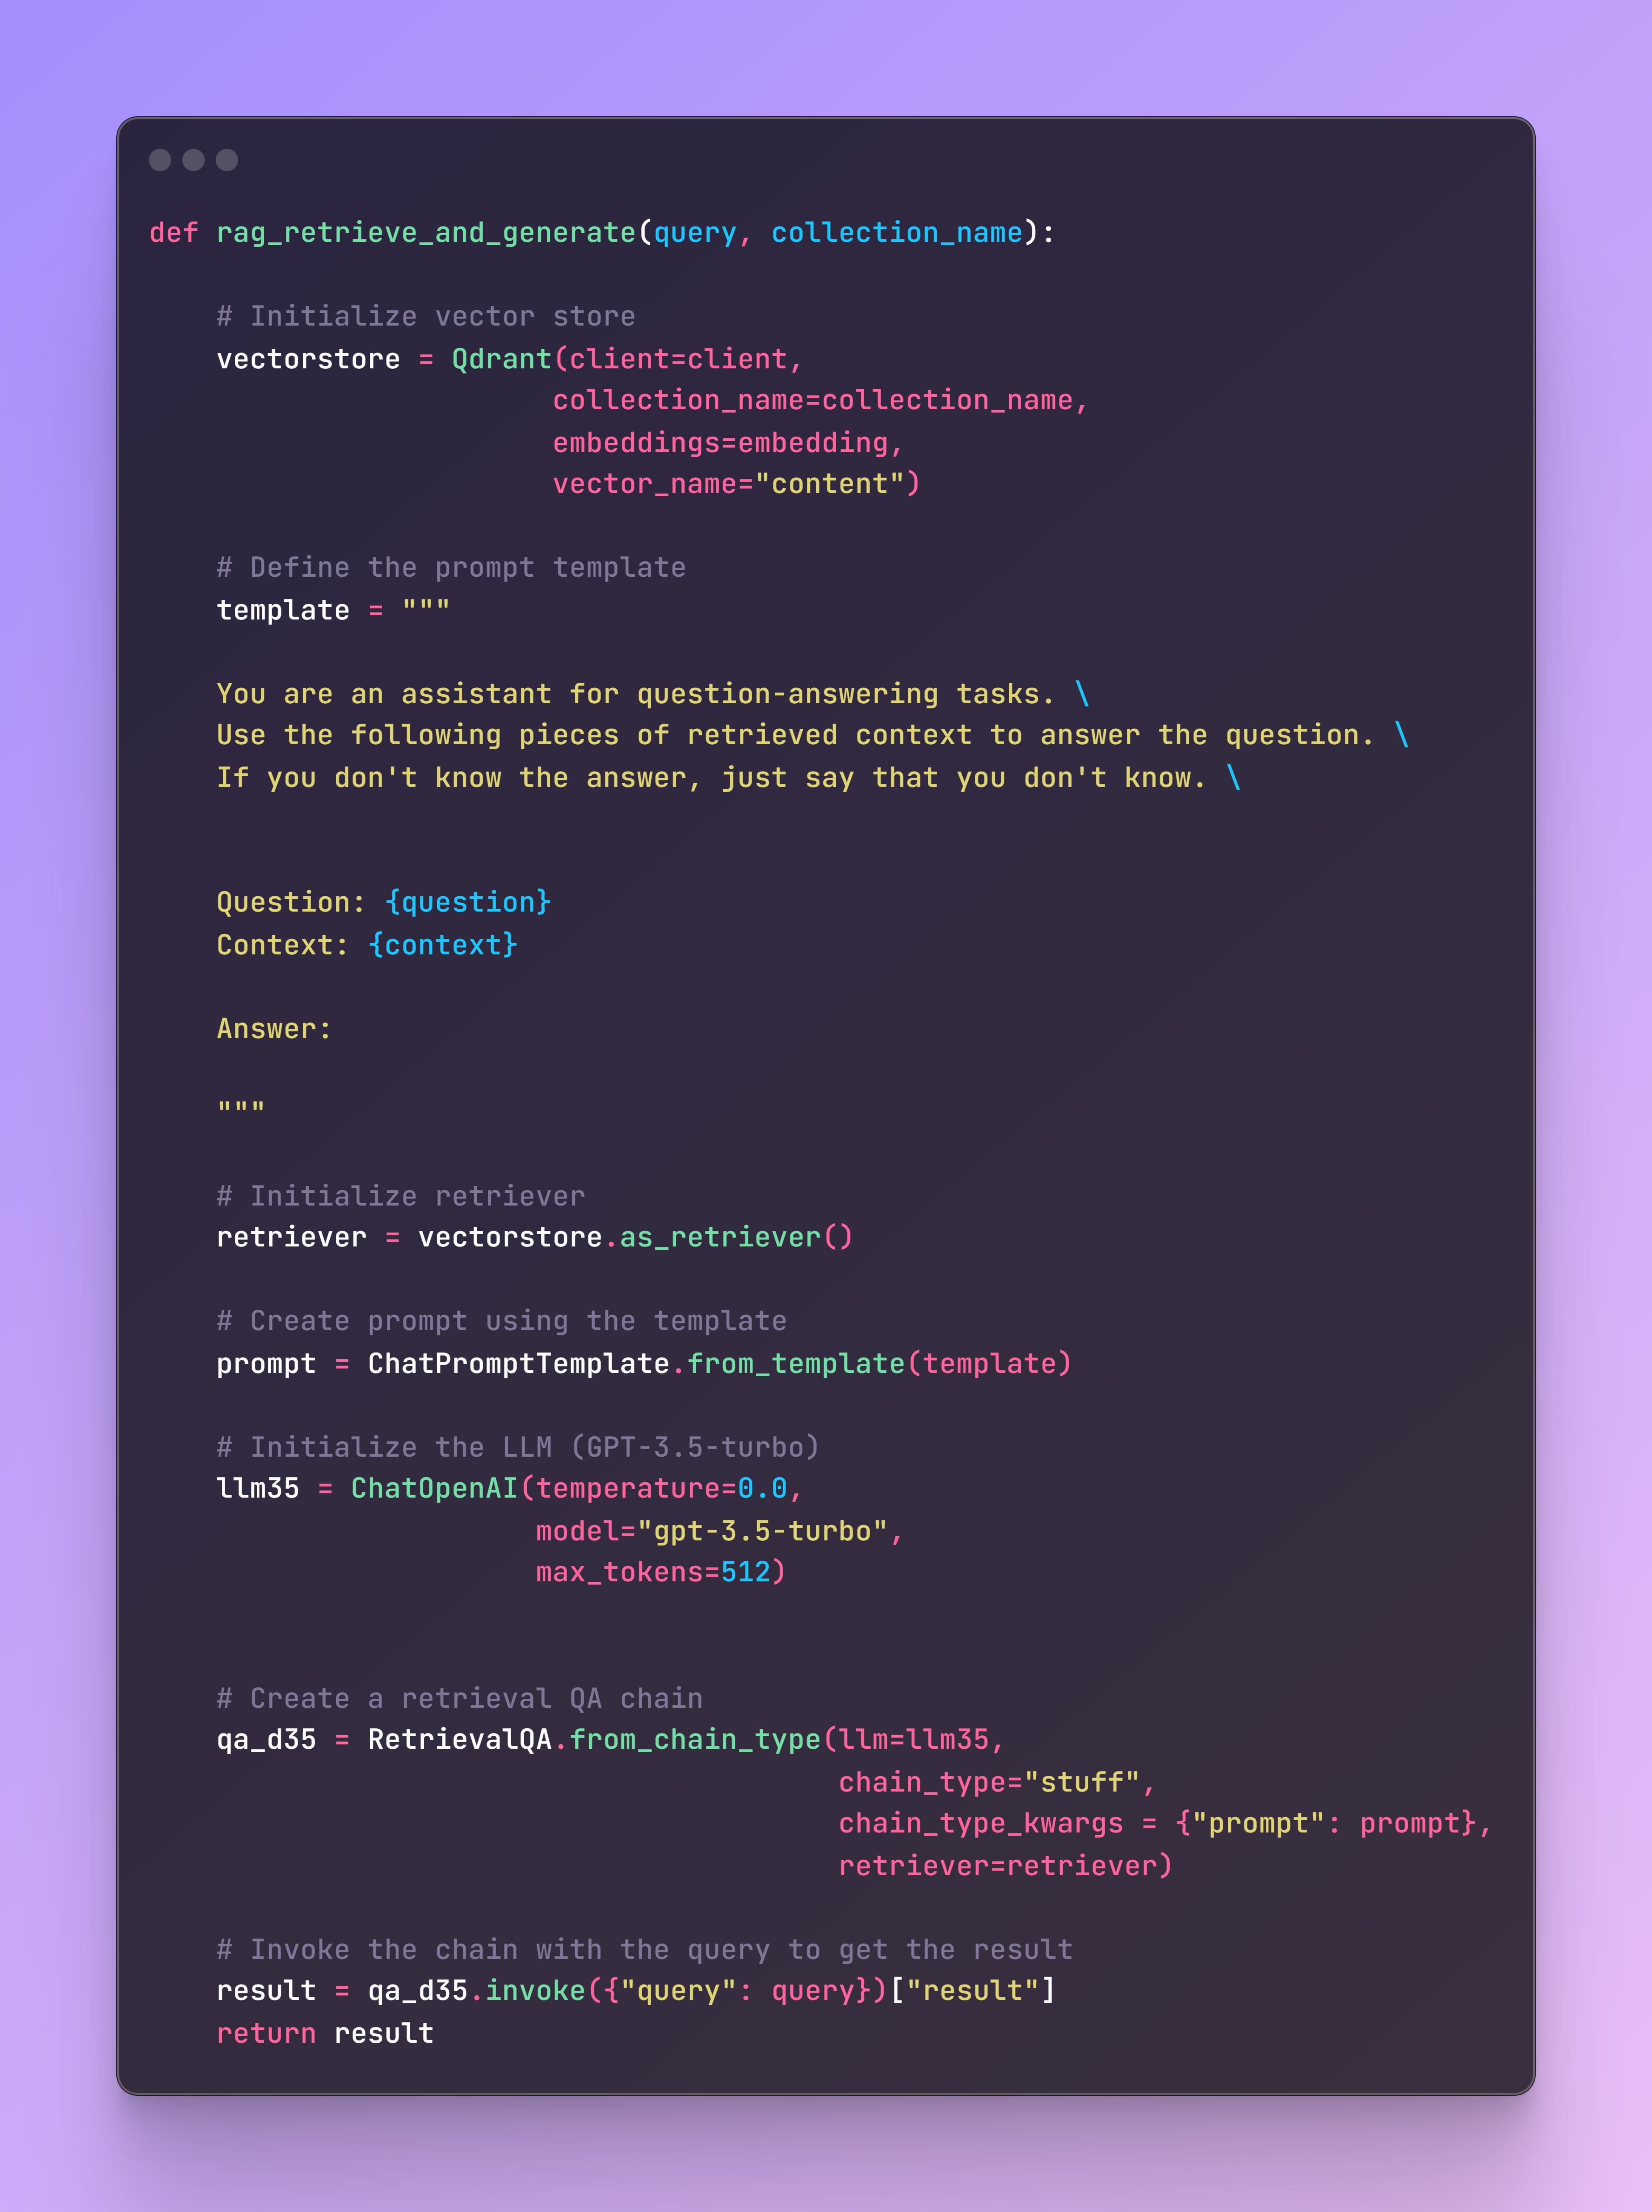
This function initializes the vector store, defines a prompt template for the LLM, and sets up the retrieval QA chain. It then invokes the chain with the provided query to retrieve context from Qdrant and generate an answer using GPT-3.5-turbo.
Here is an example of how to use this function:

Step 4: Creating the AWS Lambda
File name: lambda_function.py
Next, we need to create an AWS Lambda function that processes incoming events and generates responses using a retrieval and generation method.
Why Lambda?
AWS Lambda is a serverless compute service that allows you to run code without provisioning or managing servers. Lambda functions are event-driven, executing the code in response to events, and can be triggered by various AWS services, in our case, AWS API Gateway. Some other benefits of Lambda functions are:
- Automatic Scaling: Scales the applications by running code in parallel in response to each event. As default it provides 1'000 concurrent executions but the quota can be increased based on needs.
- Stateless: Each Lambda function invocation is stateless, meaning each execution is independent.
- No Server Management: The cloud provider AWS handles all the underlying infrastructure.
For this specific use case, this type of architecture offers numerous benefits:
1. Handling Simultaneously Requests: Due to simplified automatic scaling, which handle the incoming workload and adjust it accordingly.
2. Speeding Up Deployment: Rapid deployment and iteration of code, enabling continuous integration and continuous deployment (CI/CD) practices.
3. Cost Efficiency: You only pay for the compute time your code consumes.
4. Integration with Other AWS Services: Seamless integration with other AWS services such AWS API Gateway.
5. Improved Focus on Business Logic: Developers can focus more on writing and optimizing business logic, developing features, and enhancing the application, instead of managing infrastructure.
Lambda Function Code
Now, if we focus on the code, this Lambda function will be responsible for handling HTTP requests (events) made to our REST API, parsing the input, invoking our retrieval and generation function, and returning the response. The lambda_handler function is defined to handle incoming Lambda events. This is the main entry point for the Lambda function. We log the incoming event for debugging purposes.
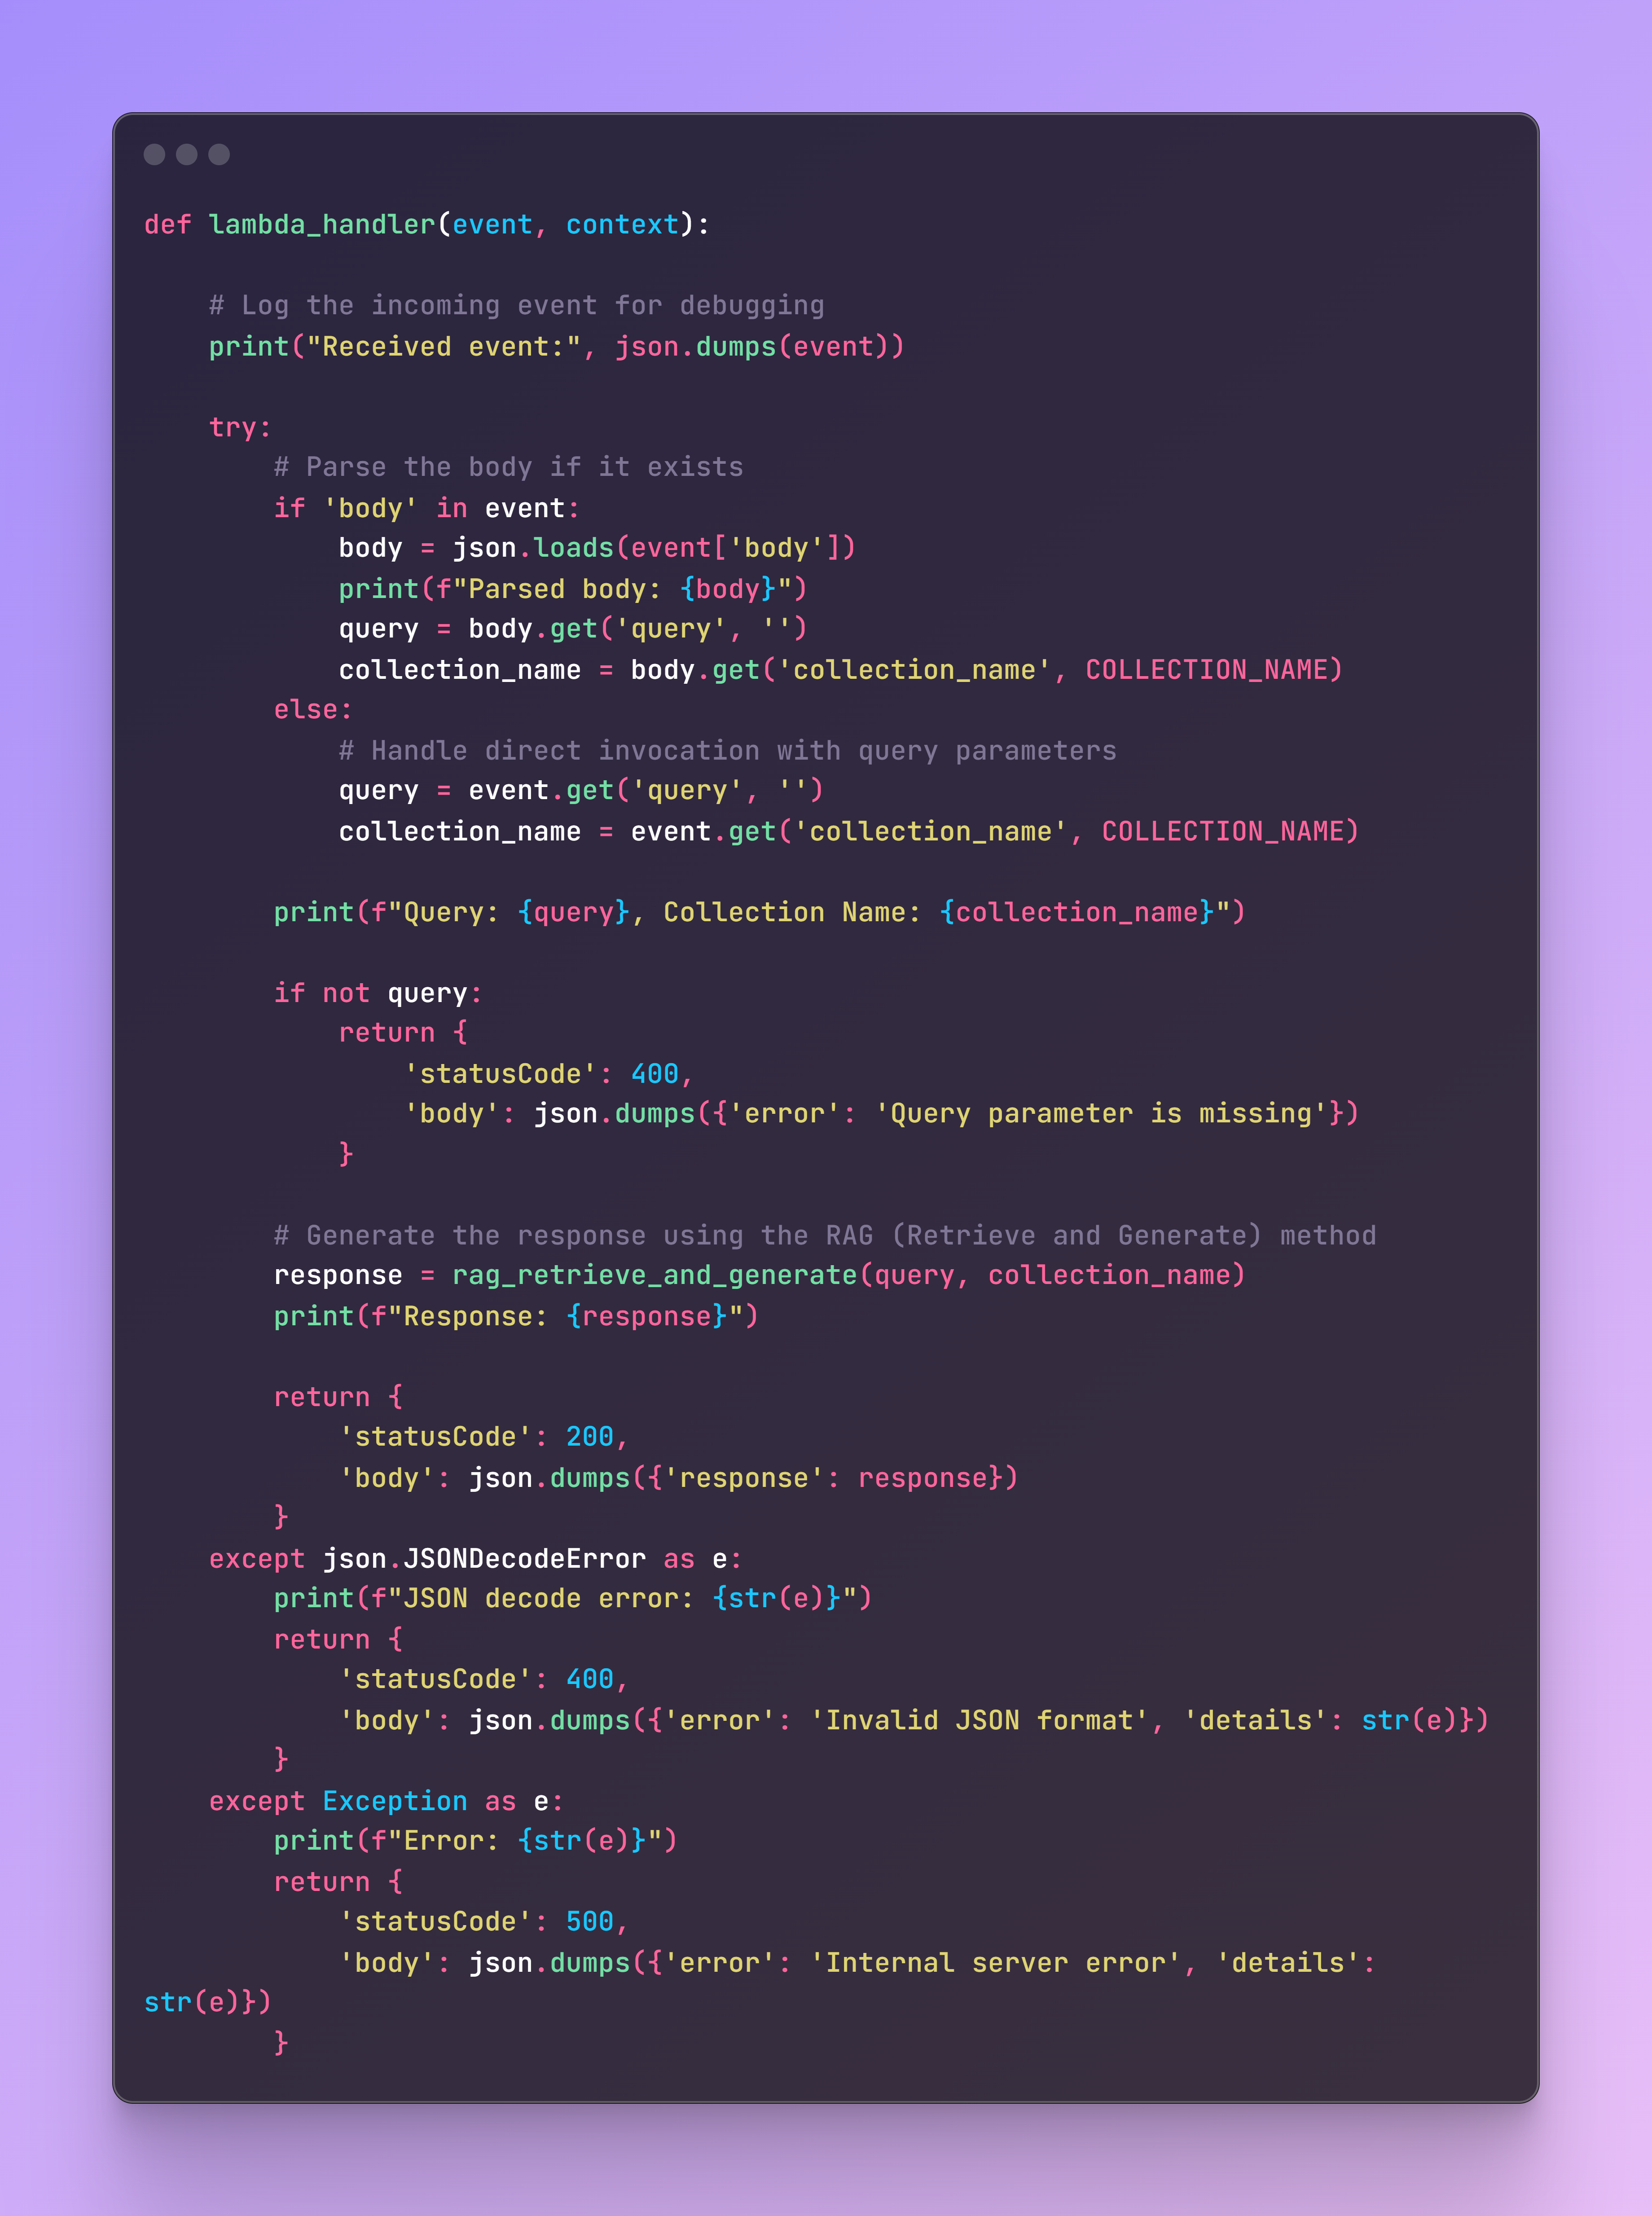
This Lambda function integrates seamlessly with AWS API Gateway (configured as a REST API) to handle HTTP requests, invoke the retrieval and generation logic, and return the results in a structured format.
Step 5: Creating and Deploying the Docker Image
File name: build_and_deploy.sh
Now we need a shell script to build and push the Docker image to AWS ECR and deploy it as an AWS Lambda function. This step involves several important tasks: building the Docker image, authenticating with AWS ECR, tagging the Docker image, pushing it to the ECR repository, and finally creating or updating the Lambda function with the new Docker image.
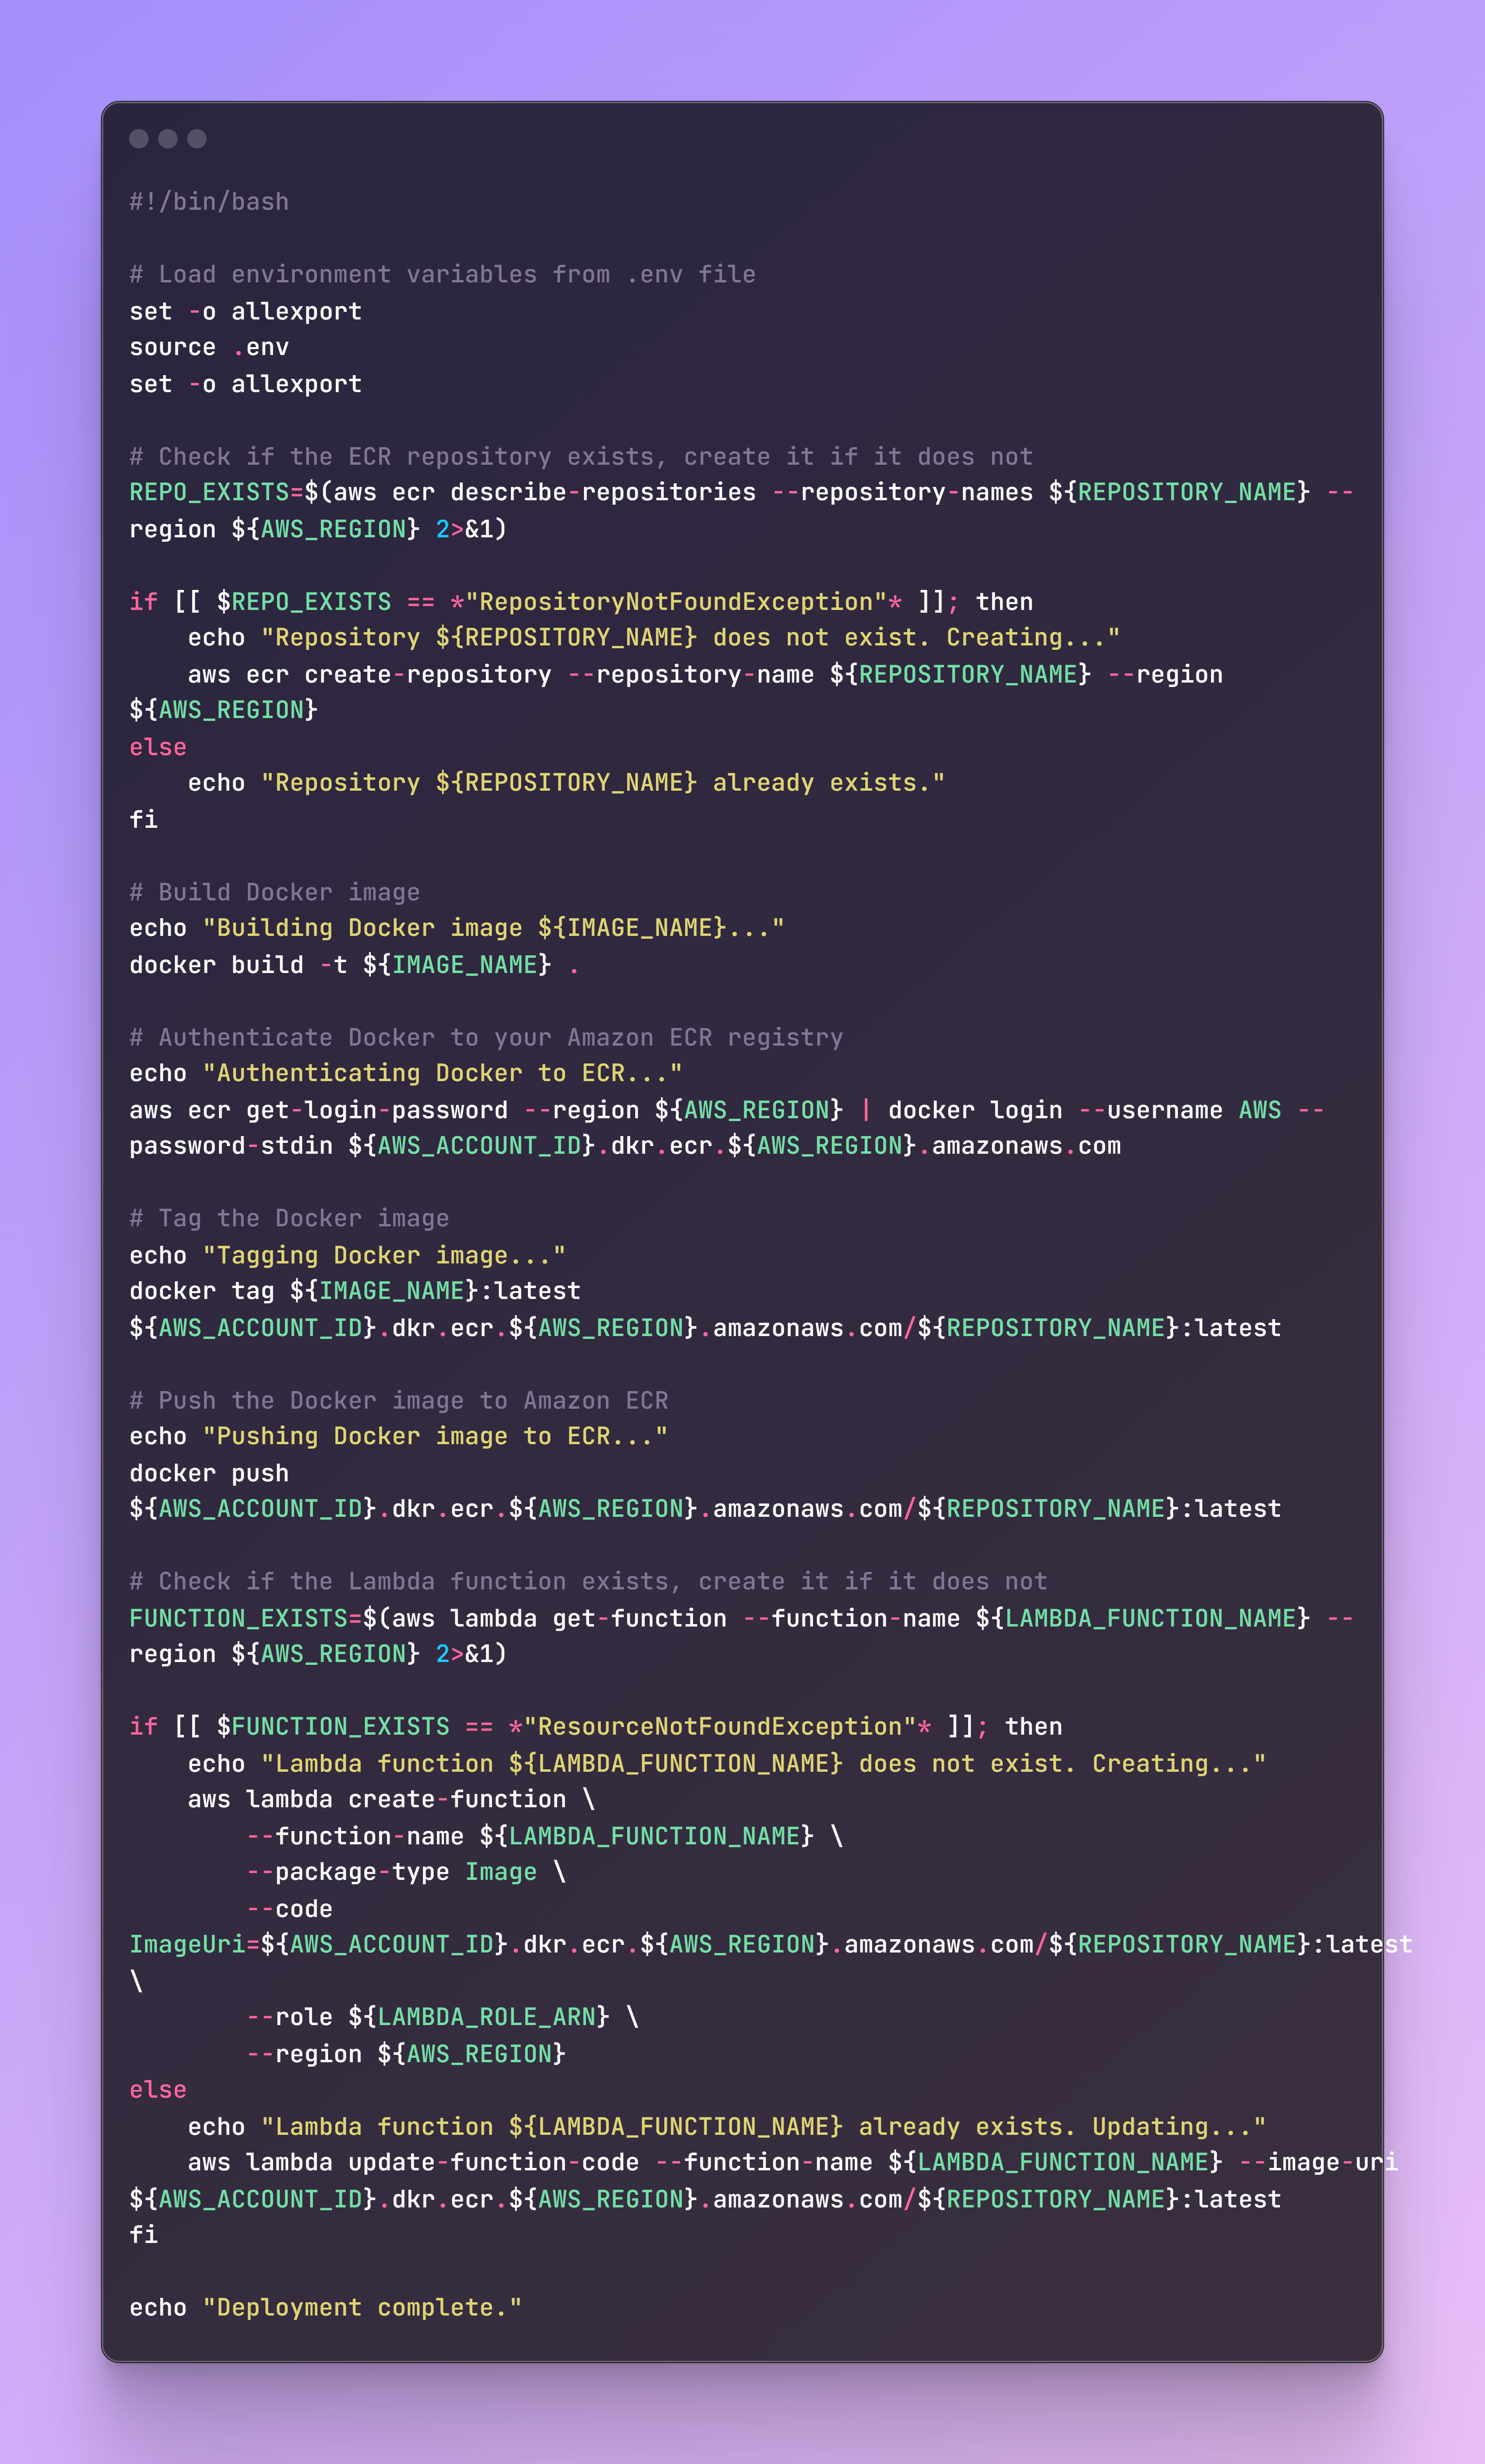
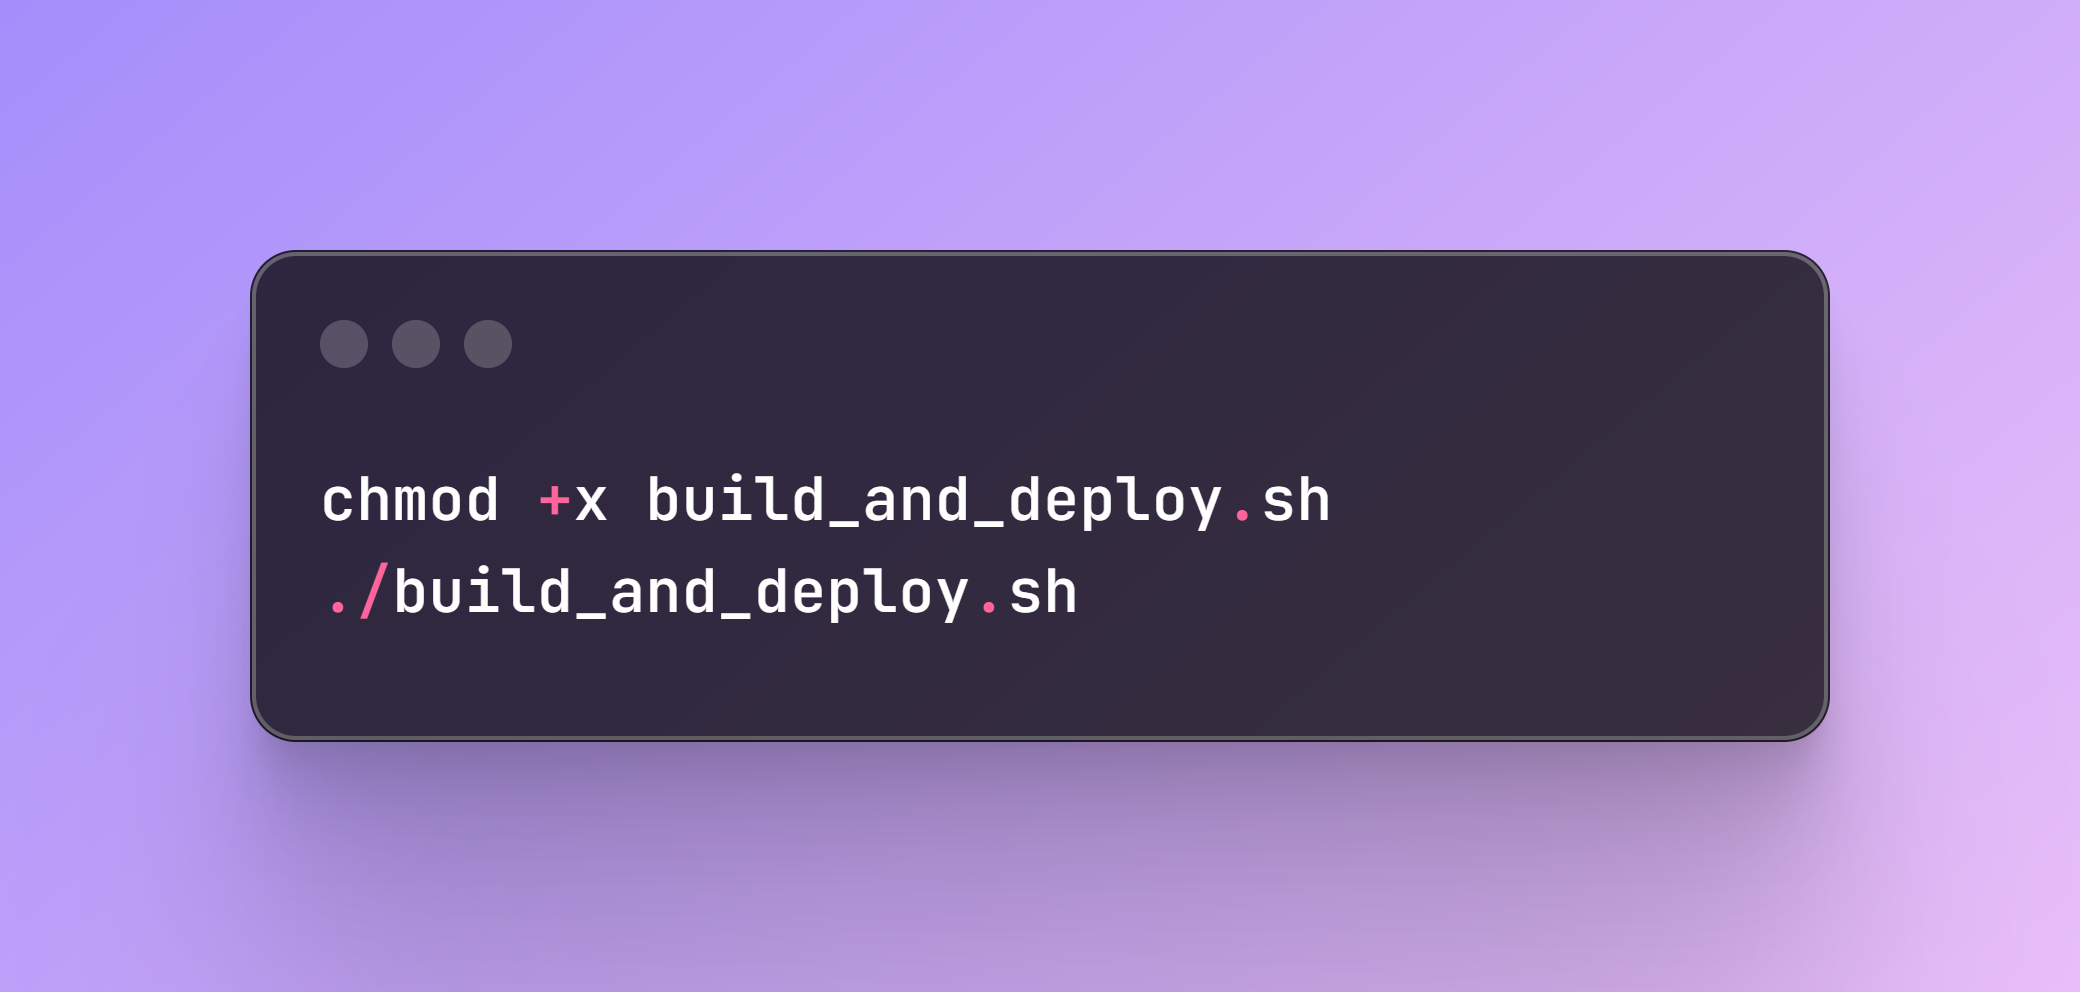
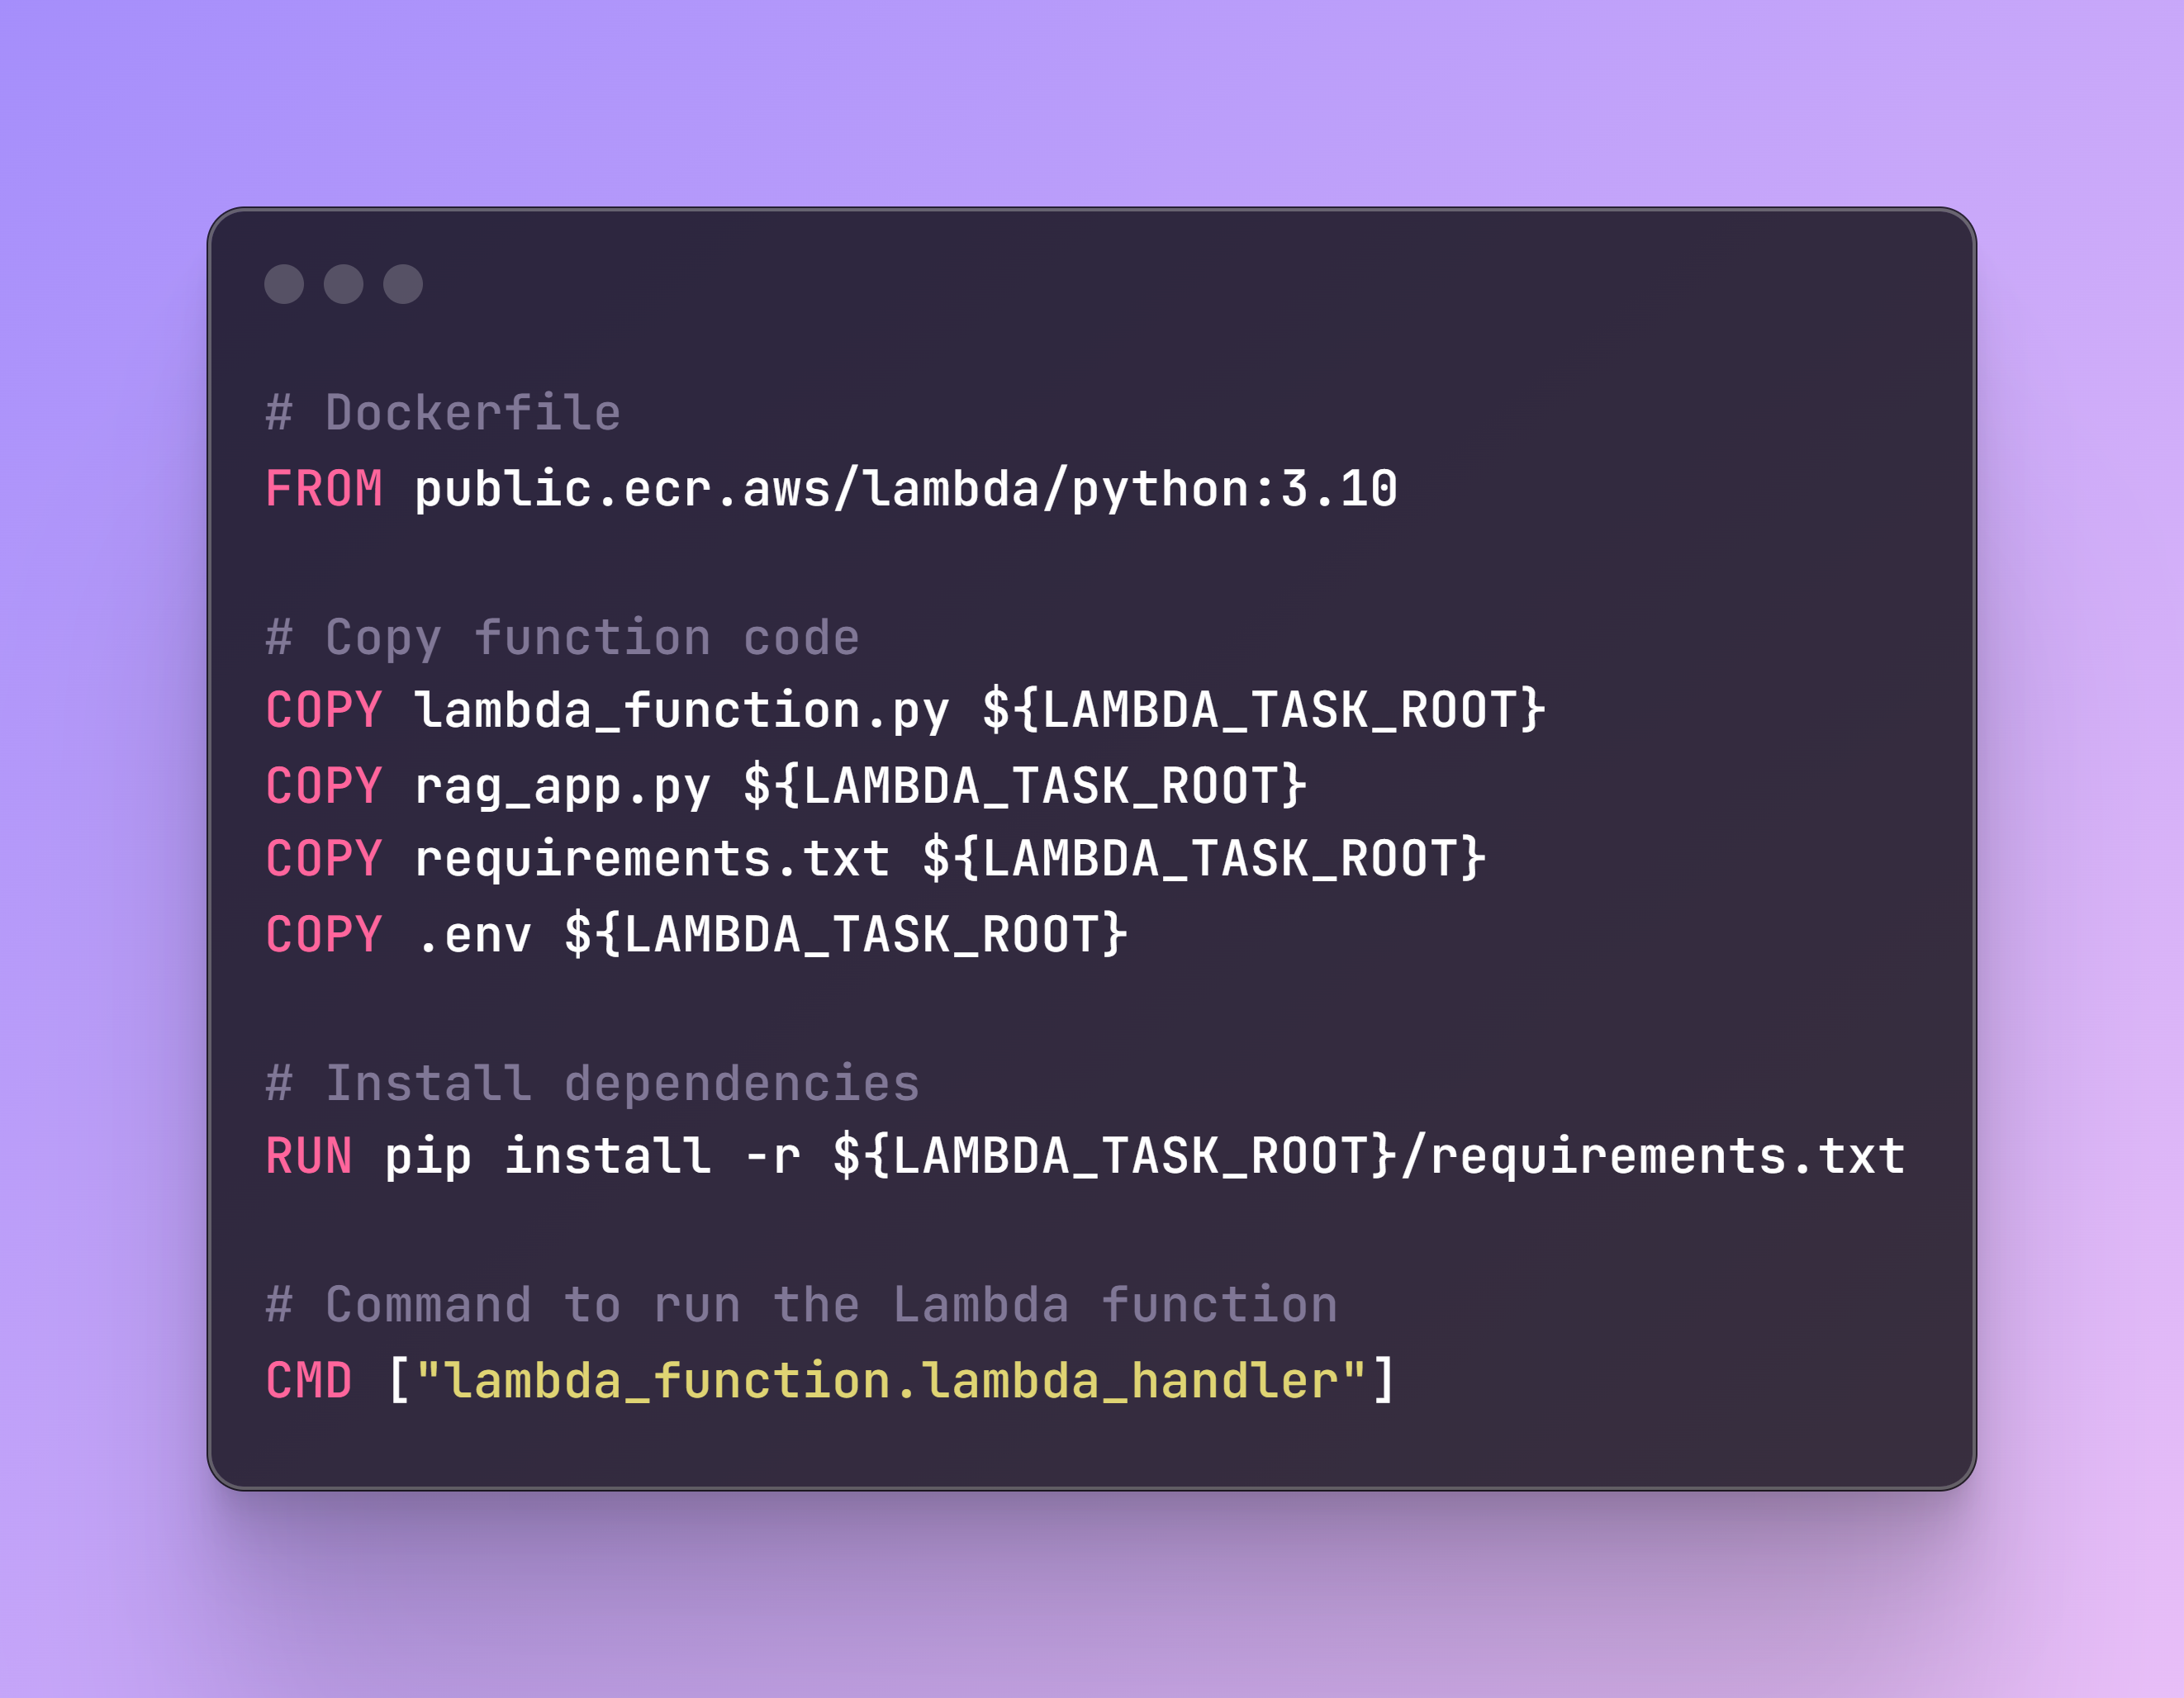
By automating this process, we ensure a smooth deployment by handling all necessary steps and checks. You should run these commands on the terminal. A specific Dockerfile is available in the repo with all requirements.
Step 6: Testing the Lambda Function
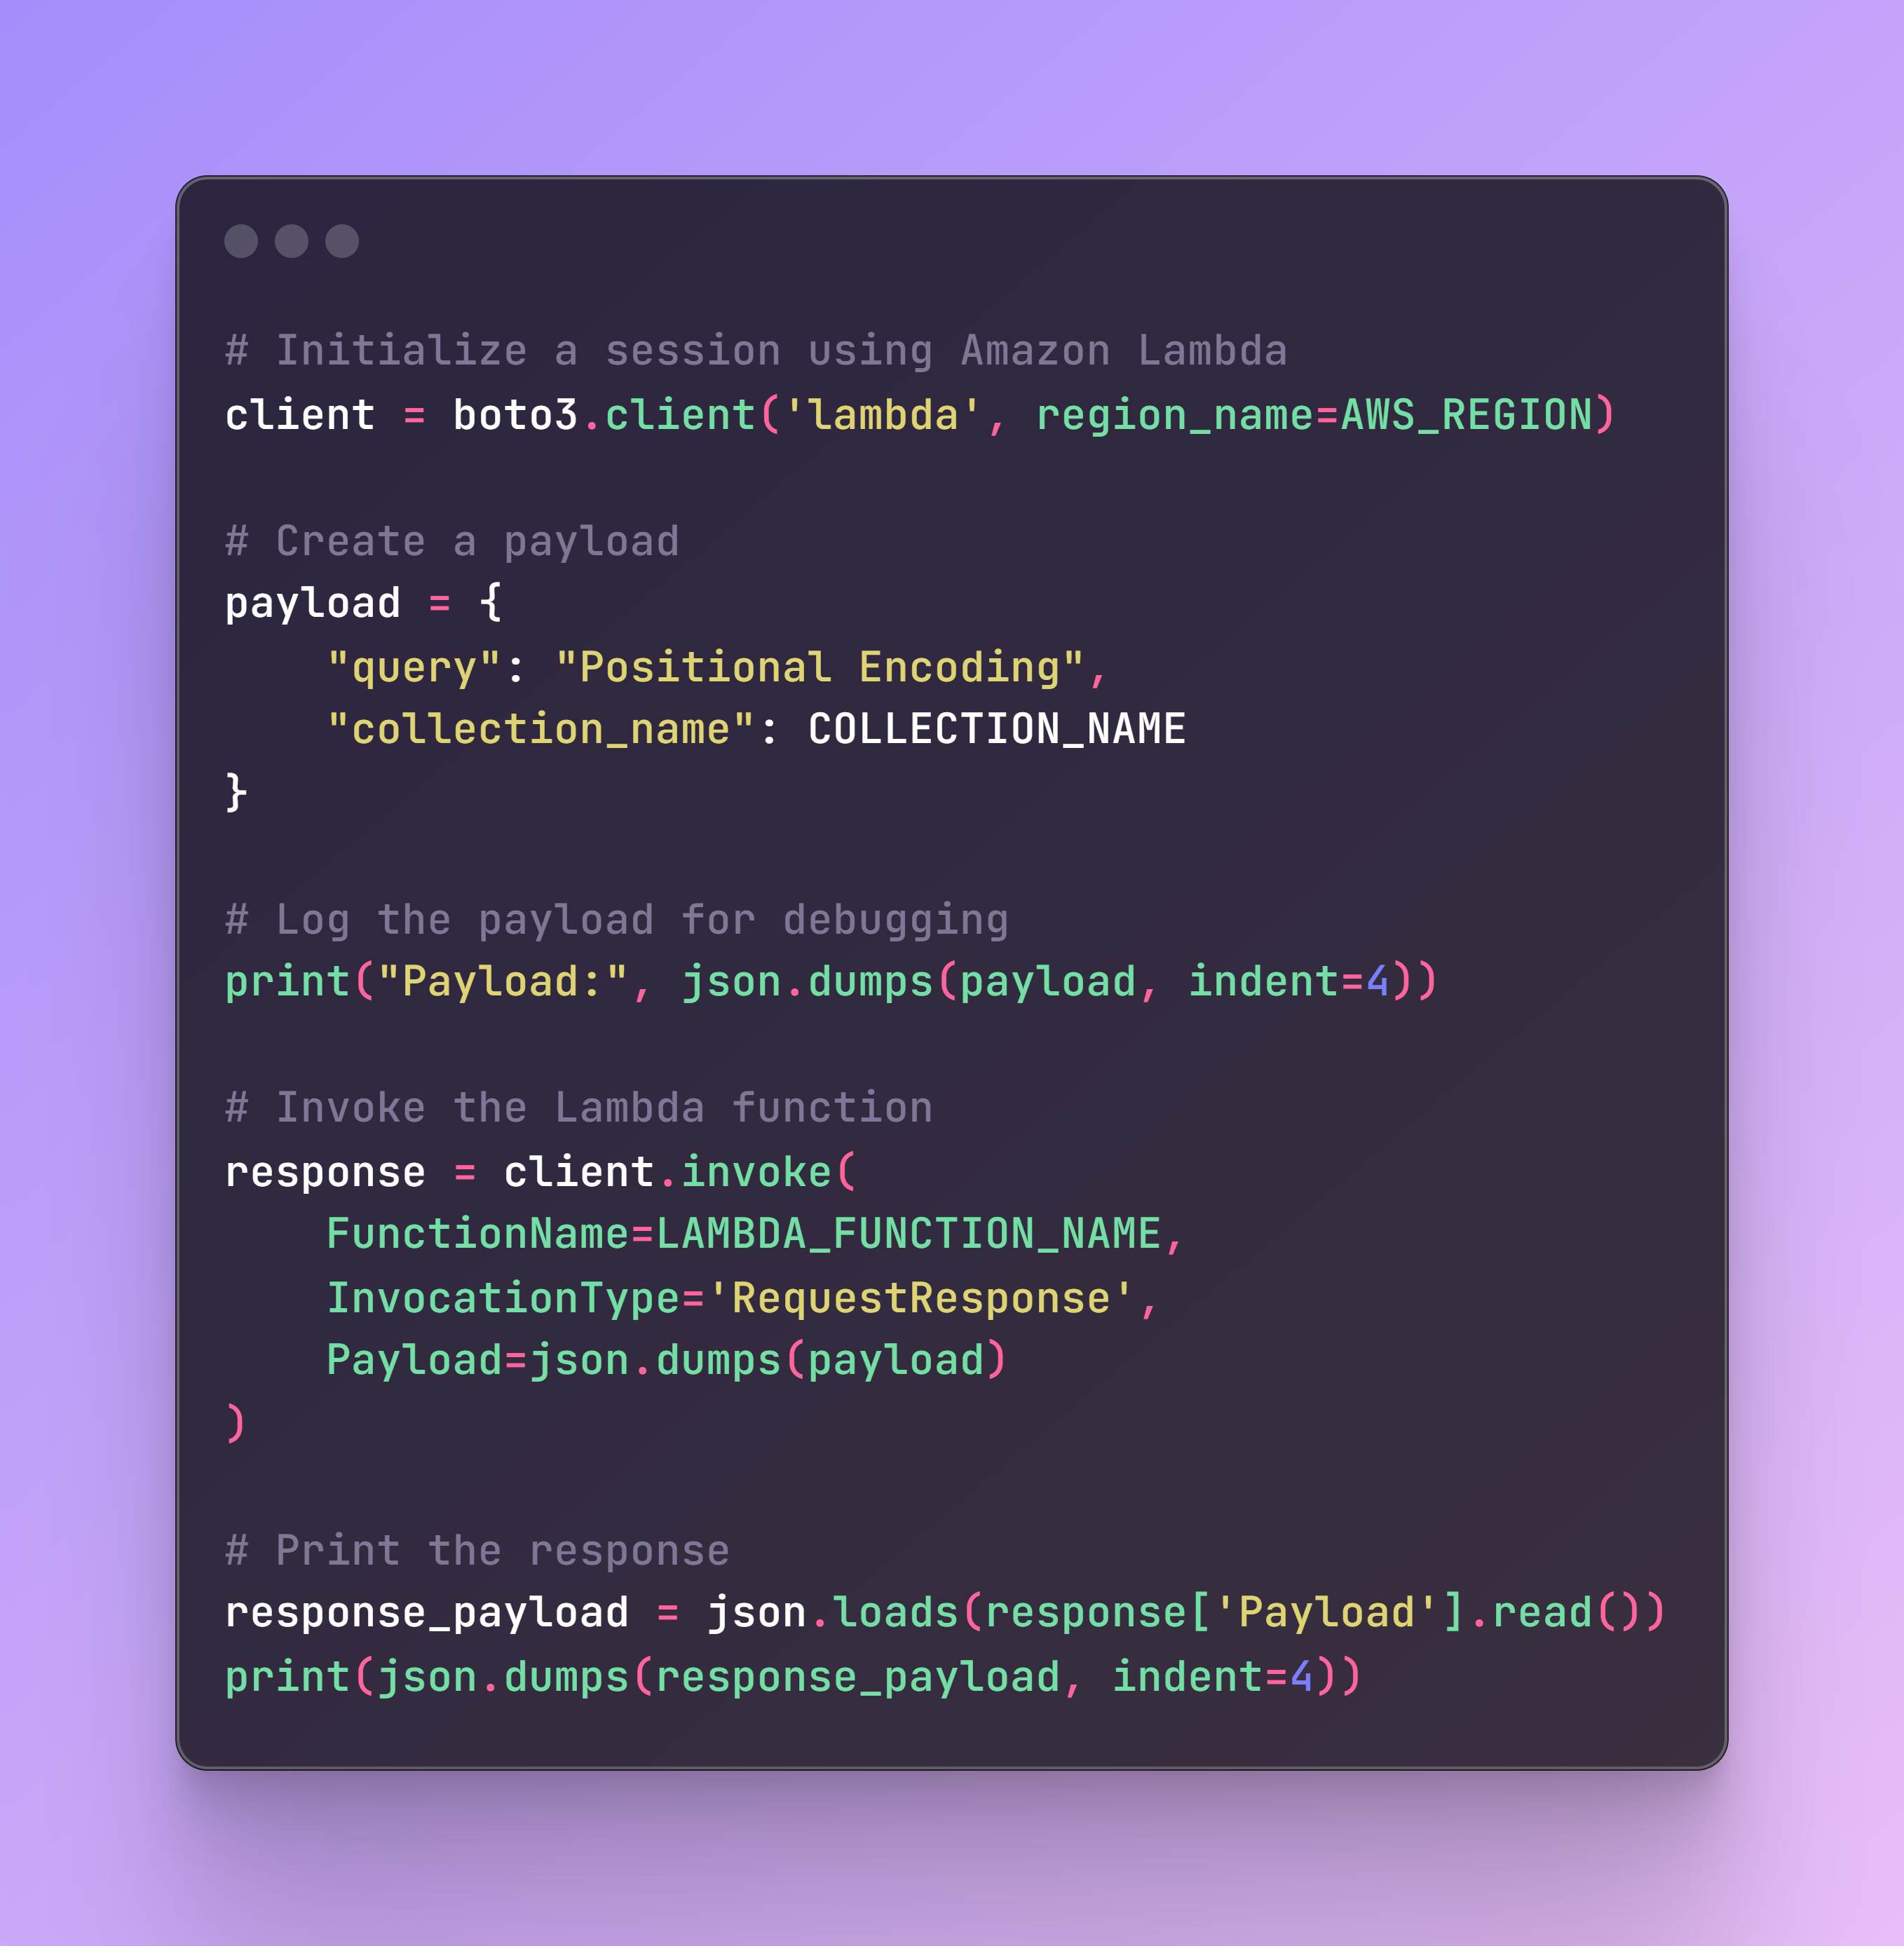
File name: test_lambda.py
Before we move forward to the Streamlit app, we need to ensure that our Lambda function is correctly set up and working. The following test script will invoke the AWS Lambda function and print the response.
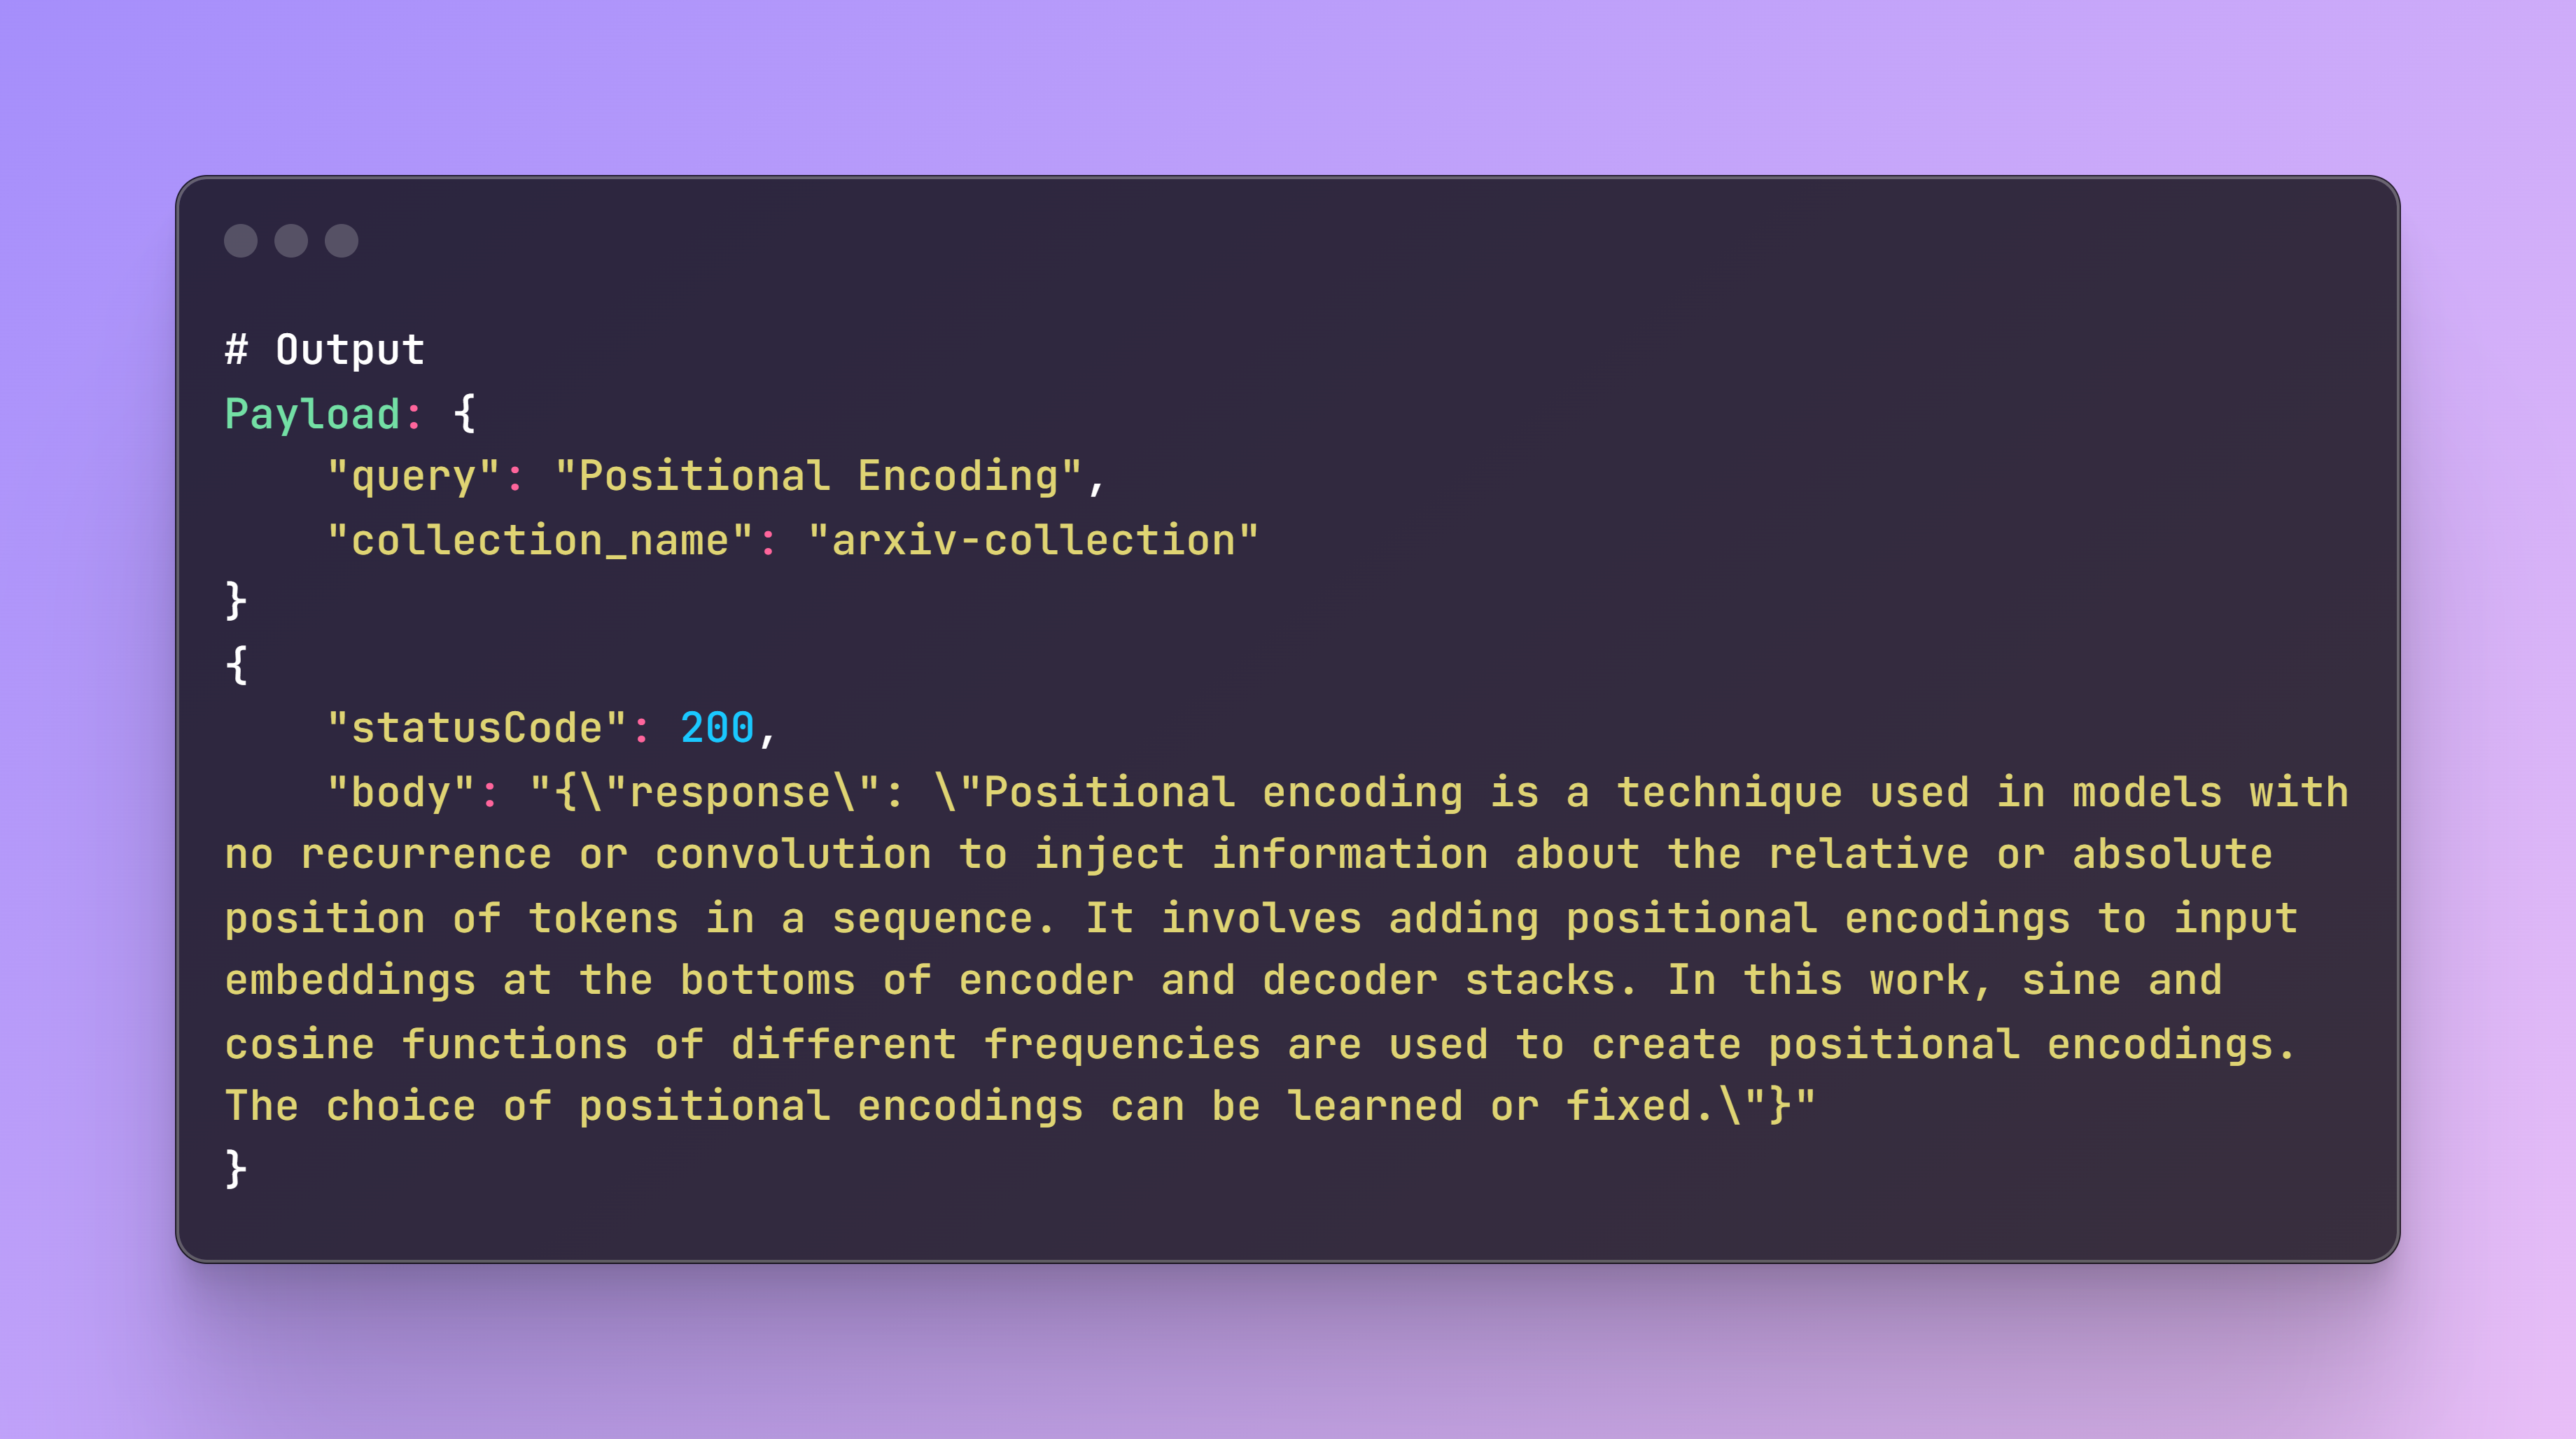
If everything is working correctly, you should see the following output. If there are any issues, the logs on the terminal and AWS CloudWatch will help in debugging and identifying the root cause.
Step 7: Create an API Gateway Endpoint
Once the lambda function is working, we need to create an API Gateway endpoint to interact with your Lambda function. Follow these steps to create the endpoint:
1. Navigate to the API Gateway Console:
- Go to the AWS Management Console.
- Open the API Gateway service.
2. Create a New REST API:
- Click on “Create API”.
- Select “REST API” and then click “Build”.
- Choose “New API”.
- Provide a name for your API.
- Click “Create API”.
3. Create a Resource:
- Click on “Create Resource”.
- Provide a Resource Name (query)
- Click “Create Resource”.
4. Create a Method:
- Select the newly created resource (/query).
- Click on “Actions” and select “Create Method”.
- Choose “POST” from the dropdown and click the checkmark.
- In the “Integration type” , select “Lambda Function”.
- Check the box for “Lambda Proxy integration”.
- In the “Lambda Function” field, select the name of your Lambda function as per LAMBDA_FUNCTION_NAMEin the .env file
- Click “Create Method”.
- You will be prompted to grant API Gateway permission to invoke your Lambda function. Click “OK”.
6. Deploy the API:
- Click on “Deploy API”.
- Create a new deployment stage (choose a name, dev).
- Click “Deploy”.
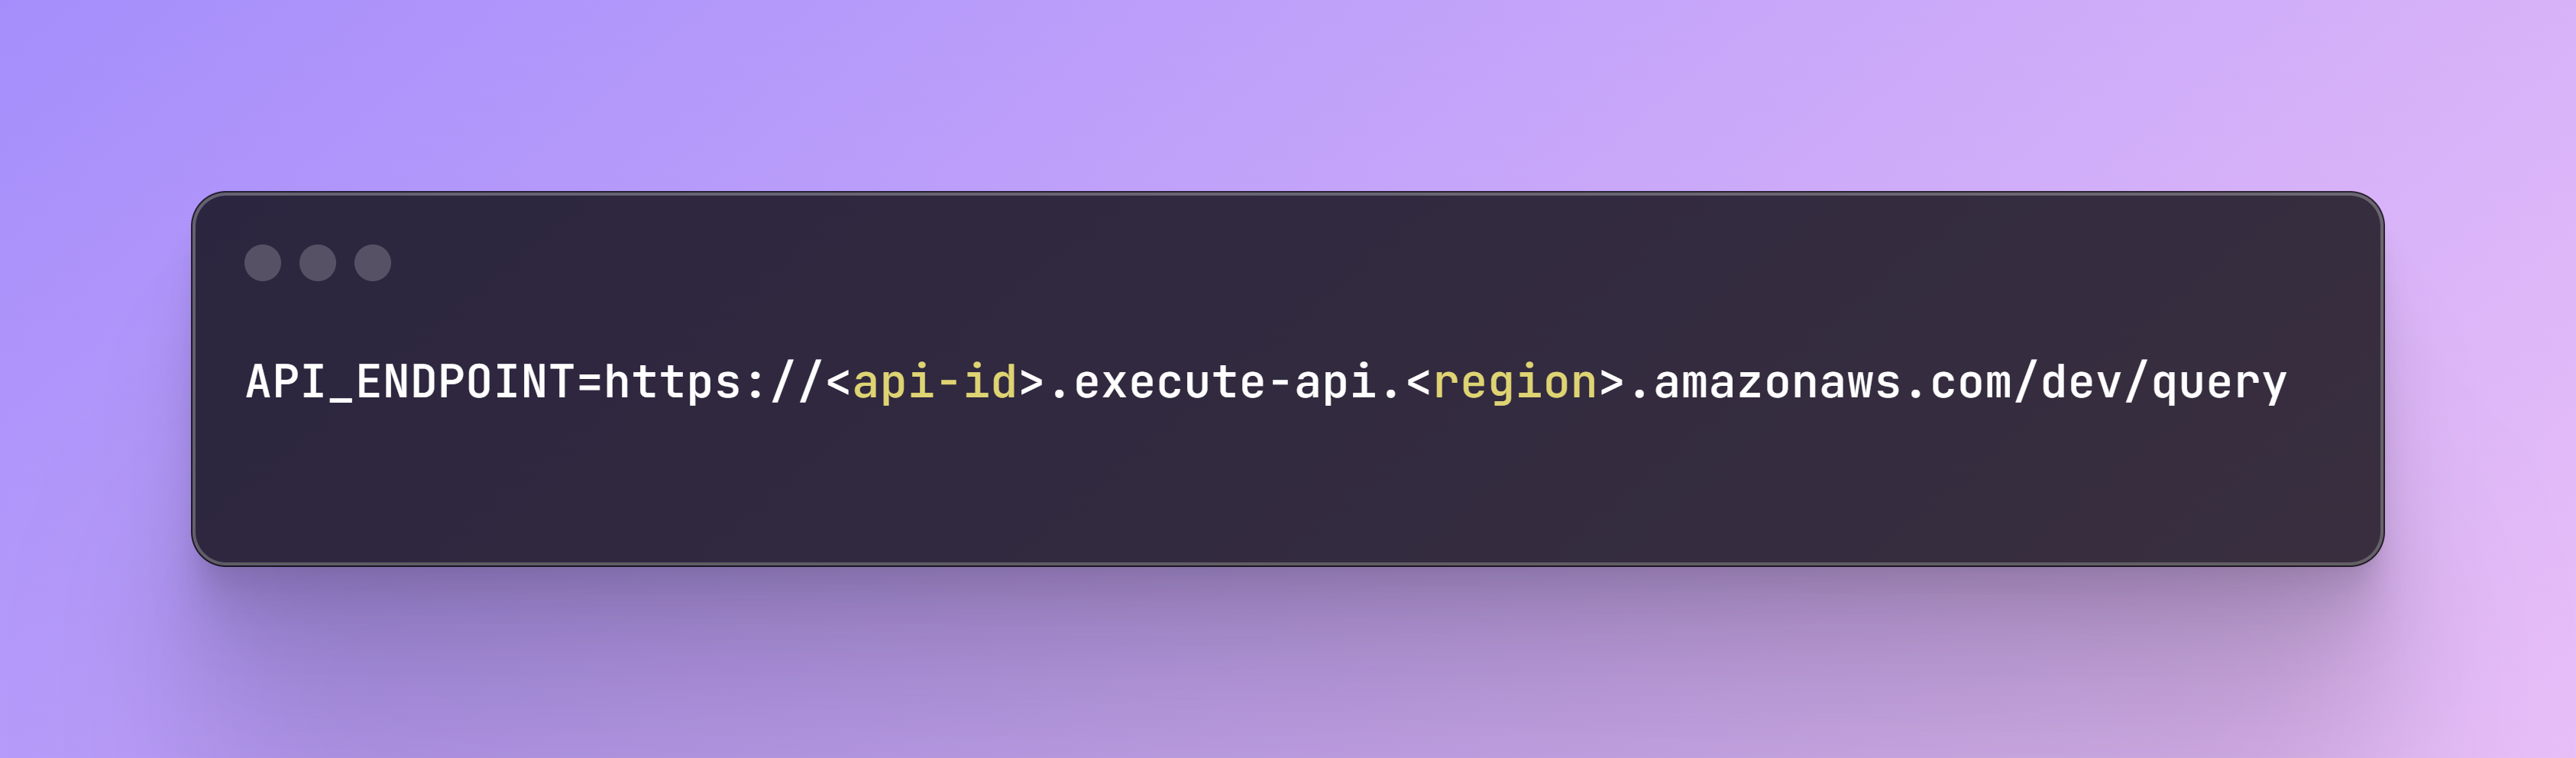
7. Get the Endpoint URL:
- After deployment, you will be provided with an Invoke URL (https://<api-id>.execute-api.<region>.amazonaws.com/dev/query), that you shall add in the .env file:
Step 8: Building the Streamlit App
File name: streamlit_app.py
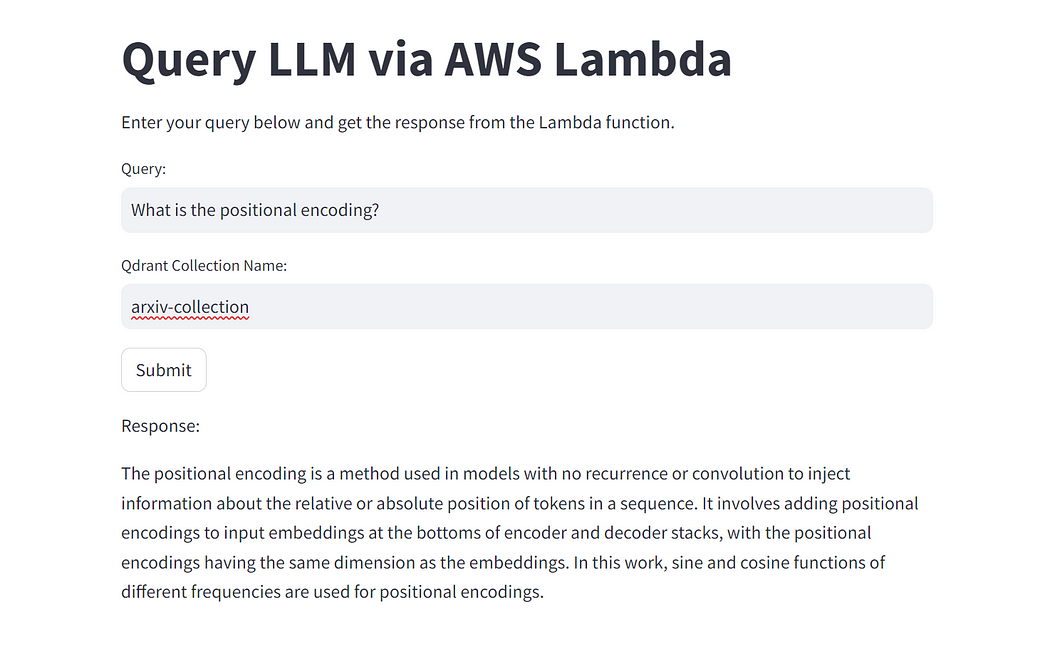
Finally, let’s build a Streamlit app to interact with our Lambda function and Qdrant collection. The Streamlit app provides a user-friendly interface to enter queries and display the responses from the Lambda function. The previously created API_ENDPOINT is integrated in the file.

To run the Streamlit app, use the following command in the terminal:

Now you can interact with the app and ask questions about the paper!
Author: Benito Martin
Don’t forget to delete the endpoint as this will incur unnecessary costs.
Conclusion
In this post, we walked through building a serverless application using AWS Lambda, AWS API Gateway and Qdrant for semantic search. We created a Python script to download and process academic papers, a Lambda function to handle search queries, and a Streamlit app for user interaction. This architecture allows for scalable and efficient semantic search over large document collections.
If you enjoyed reading this content you can support it by:
- Clapping and following me on Medium! 👏 👏 👏
- Follow my Github 🎶 🎷 🎶
- Staring the repo ⭐⭐⭐
- Share my content on LinkedIn! 💯💯💯
Happy coding!
Originally posted at:
Dive in
Related
Blog
How to Build Your First Semantic Search System: My Step-by-Step Guide with Code
By Sonam Gupta • Jan 5th, 2024 • Views 1.1K
Blog
Find Your Code! Scaling a LlamaIndex and Qdrant Application with Google Kubernetes Engine
By Benito Martin • Jul 8th, 2024 • Views 986
Video
Information Retrieval & Relevance: Vector Embeddings for Semantic Search
By Daniel Svonava • Feb 24th, 2024 • Views 1.4K
Blog
Find Your Code! Scaling a LlamaIndex and Qdrant Application with Google Kubernetes Engine
By Benito Martin • Jul 8th, 2024 • Views 986
Video
Information Retrieval & Relevance: Vector Embeddings for Semantic Search
By Daniel Svonava • Feb 24th, 2024 • Views 1.4K
Blog
How to Build Your First Semantic Search System: My Step-by-Step Guide with Code
By Sonam Gupta • Jan 5th, 2024 • Views 1.1K